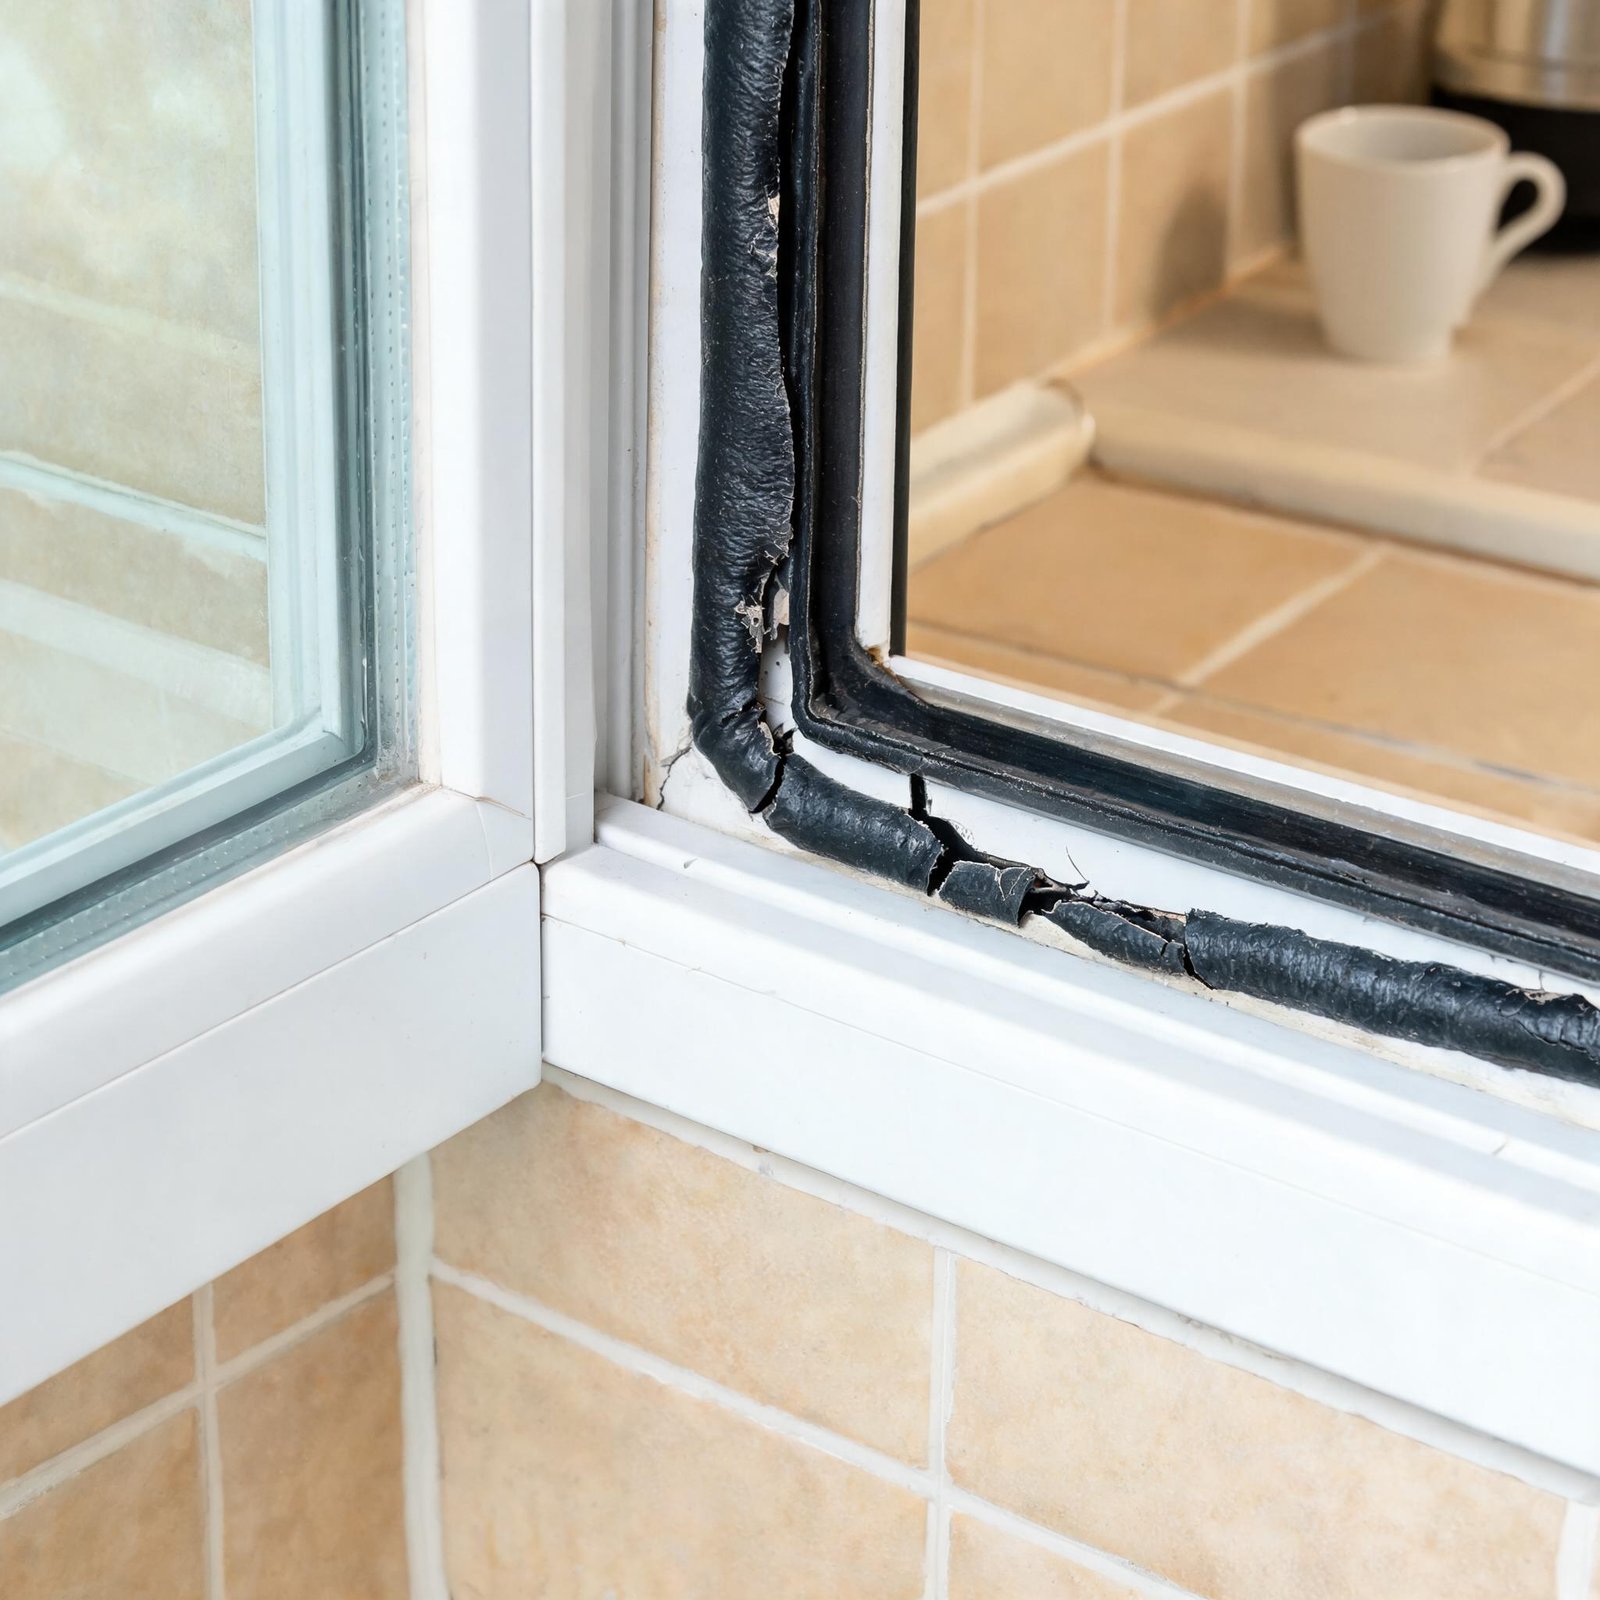
Let’s cut the crap: if you’re staring at cracked rubber seals on kitchen windows, you’re not just looking at an eyesore—you’re bleeding money through your walls. That worn-out paint and those disintegrating gaskets are the first signs of a full-blown energy leak. You’ve got a choice: slap on a band-aid with caulk and hope it holds for another season, or rip out the root cause and install a permanent fix that actually stops drafts and lowers your heating bill. We’ve been doing this for 15 years, hundreds of jobs from Miami to Minneapolis, and I can tell you straight: the homeowner who tackles this right the first time never has to post on Reddit about it again. Superwindowhouse offers replacement vinyl window seals and easy-to-install window kits that restore insulation and stop drafts. Our durable PVC frames resist cracking, so once you’re done, you’re done—no more winter drafts seeping past rotten rubber.
Why a Quick Fix Won’t Survive Your Next Season
You’re a first-time DIYer, so let’s skip the theory and get into what’s actually failing. Those rubber seals—often EPDM or TPE—degrade for three reasons: UV exposure, temperature cycling, and plain old age. Your kitchen window might get direct light a few hours a day, but that UV radiation is cooking the rubber molecules, turning them brittle. Then the constant expansion and contraction through freeze-thaw cycles (even in milder climates, think 80°F days to 40°F nights) creates micro-cracks. By year five, you’ve got gaps big enough to feel a draft on your arm. The worn-out paint isn’t just cosmetic; it’s evidence that moisture is getting behind the frame, swelling the wood or rotting the sashes.
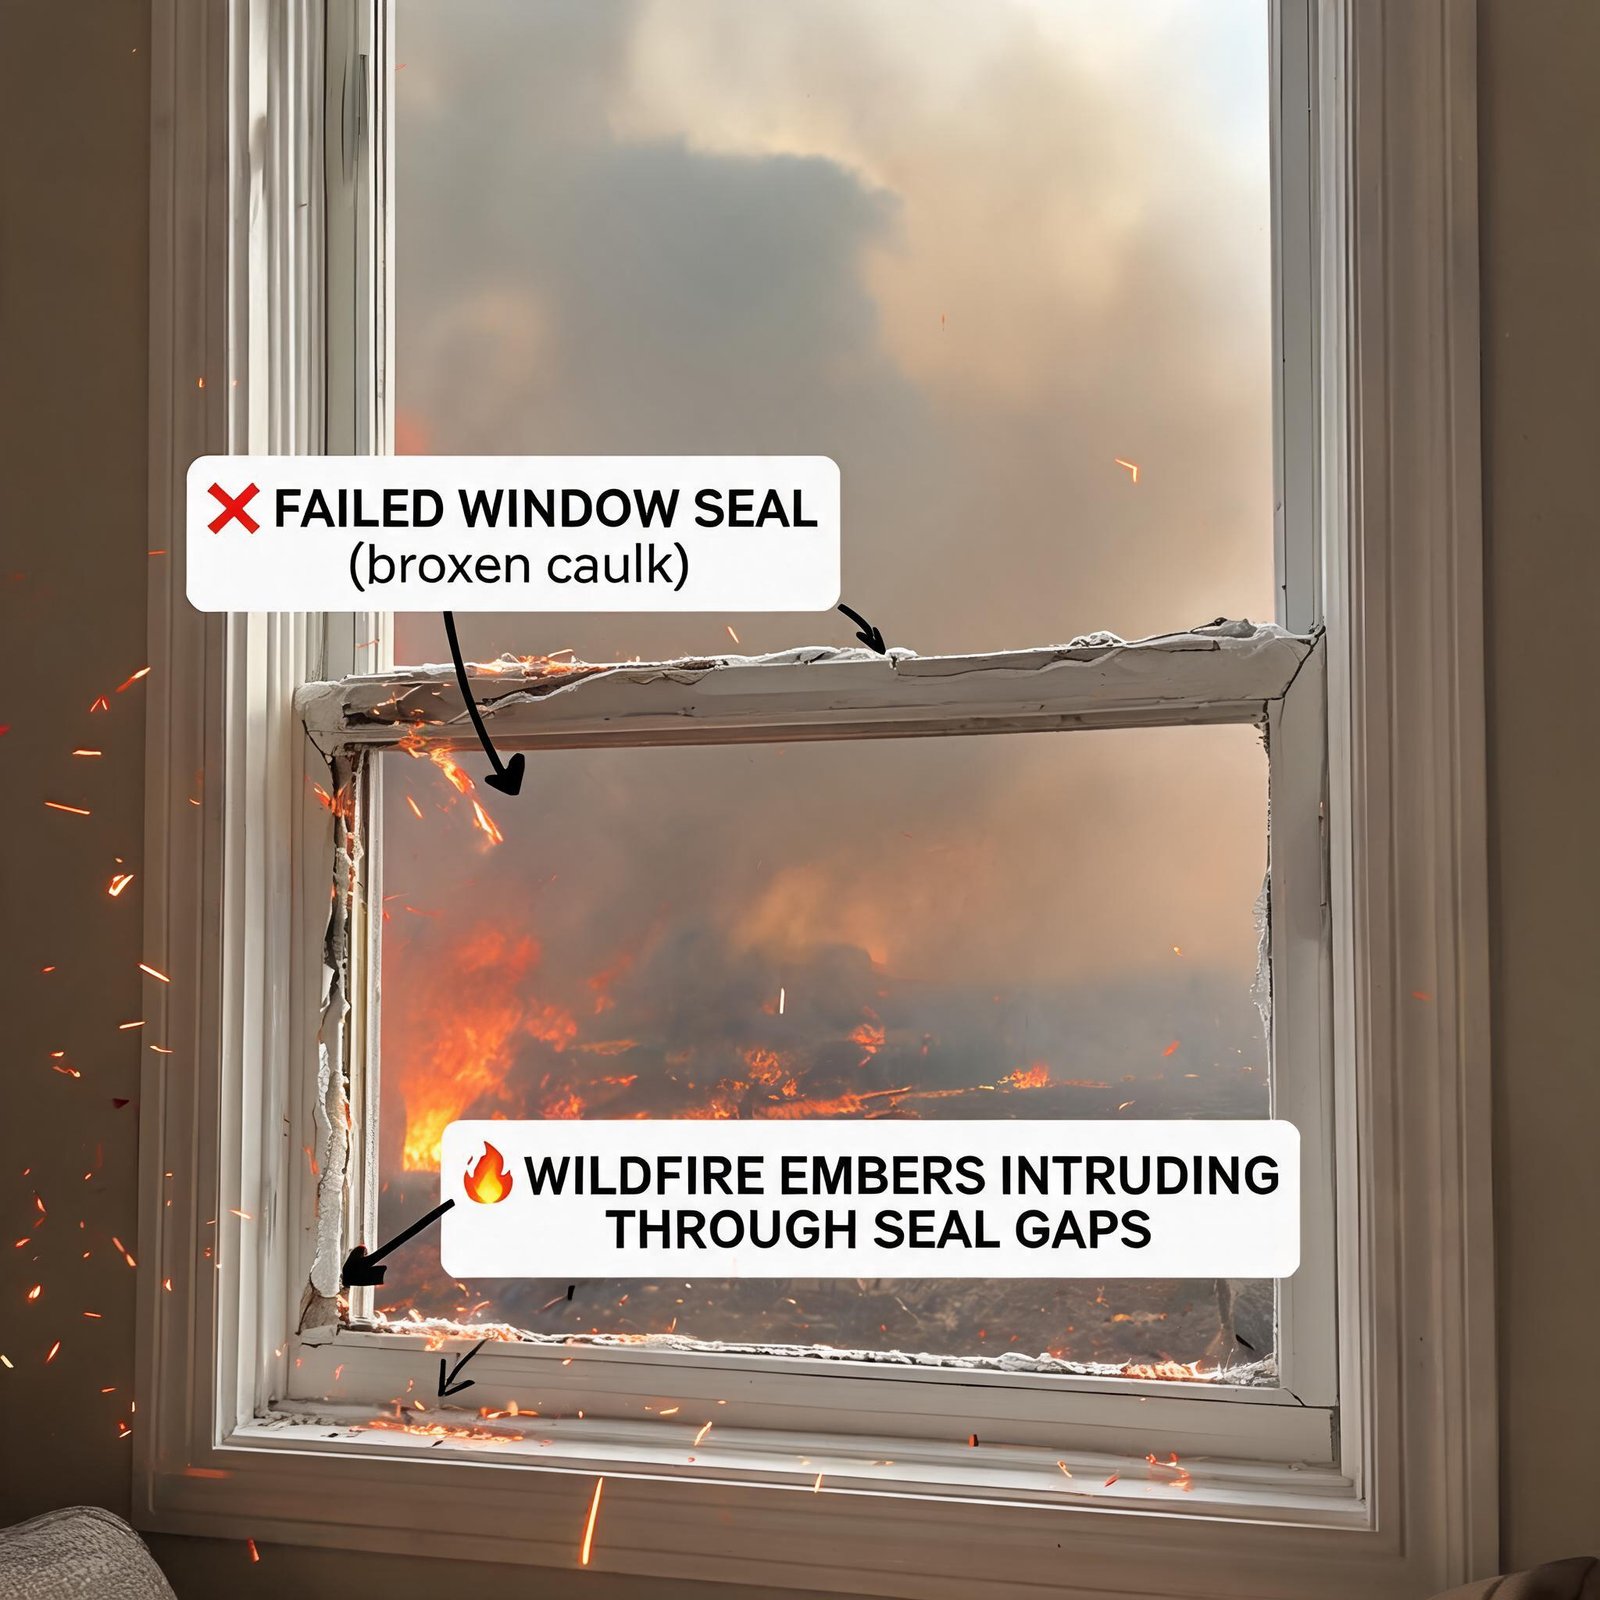
Now, here’s where the average homeowner screws up: they buy a tube of silicone caulk, smear it over the cracks, and call it done. Three months later, that caulk shrinks, peels, or fails because it can’t handle the movement of the window glass. Rubber seals are designed to flex with the window—static caulk isn’t. You need a replacement that mimics the original function: a flexible, weather-tight barrier that compresses and rebounds through thousands of open-and-close cycles.
The Hard Truth About Repair Kits vs. Full Replacement
You’re probably wondering: do I buy a seal-only repair kit, or do I go full window swap? It’s a valid question. For a first DIY project, a seal repair is doable if the frame and glass are sound. But here’s the catch—if your windows are aluminum or older vinyl, the seals are often integrated into the frame. You can’t just yank them out and press in a new one. You need a compatible product that matches the exact groove depth (usually 4mm to 8mm) and cross-section shape (bulb, V-strip, or fin). That’s why generic rolls of weatherstripping from the hardware store fail: they don’t compress properly, leaving air gaps.
But man, if the sash is warped, the glass is foggy, or the frame itself is cracked, you’re better off swapping the whole window unit. A modern vinyl replacement kit gets you a new PVC frame with integral seals, a low-E glass package, and a u-factor around 0.30 or better. That’s not just a repair—that’s a performance upgrade. And let’s be blunt: the time you spend chasing old rubber seals could be better spent installing a pre-built kit that takes two hours and gives you another 20 years of insulation.
Your DIY Materials List—No BS
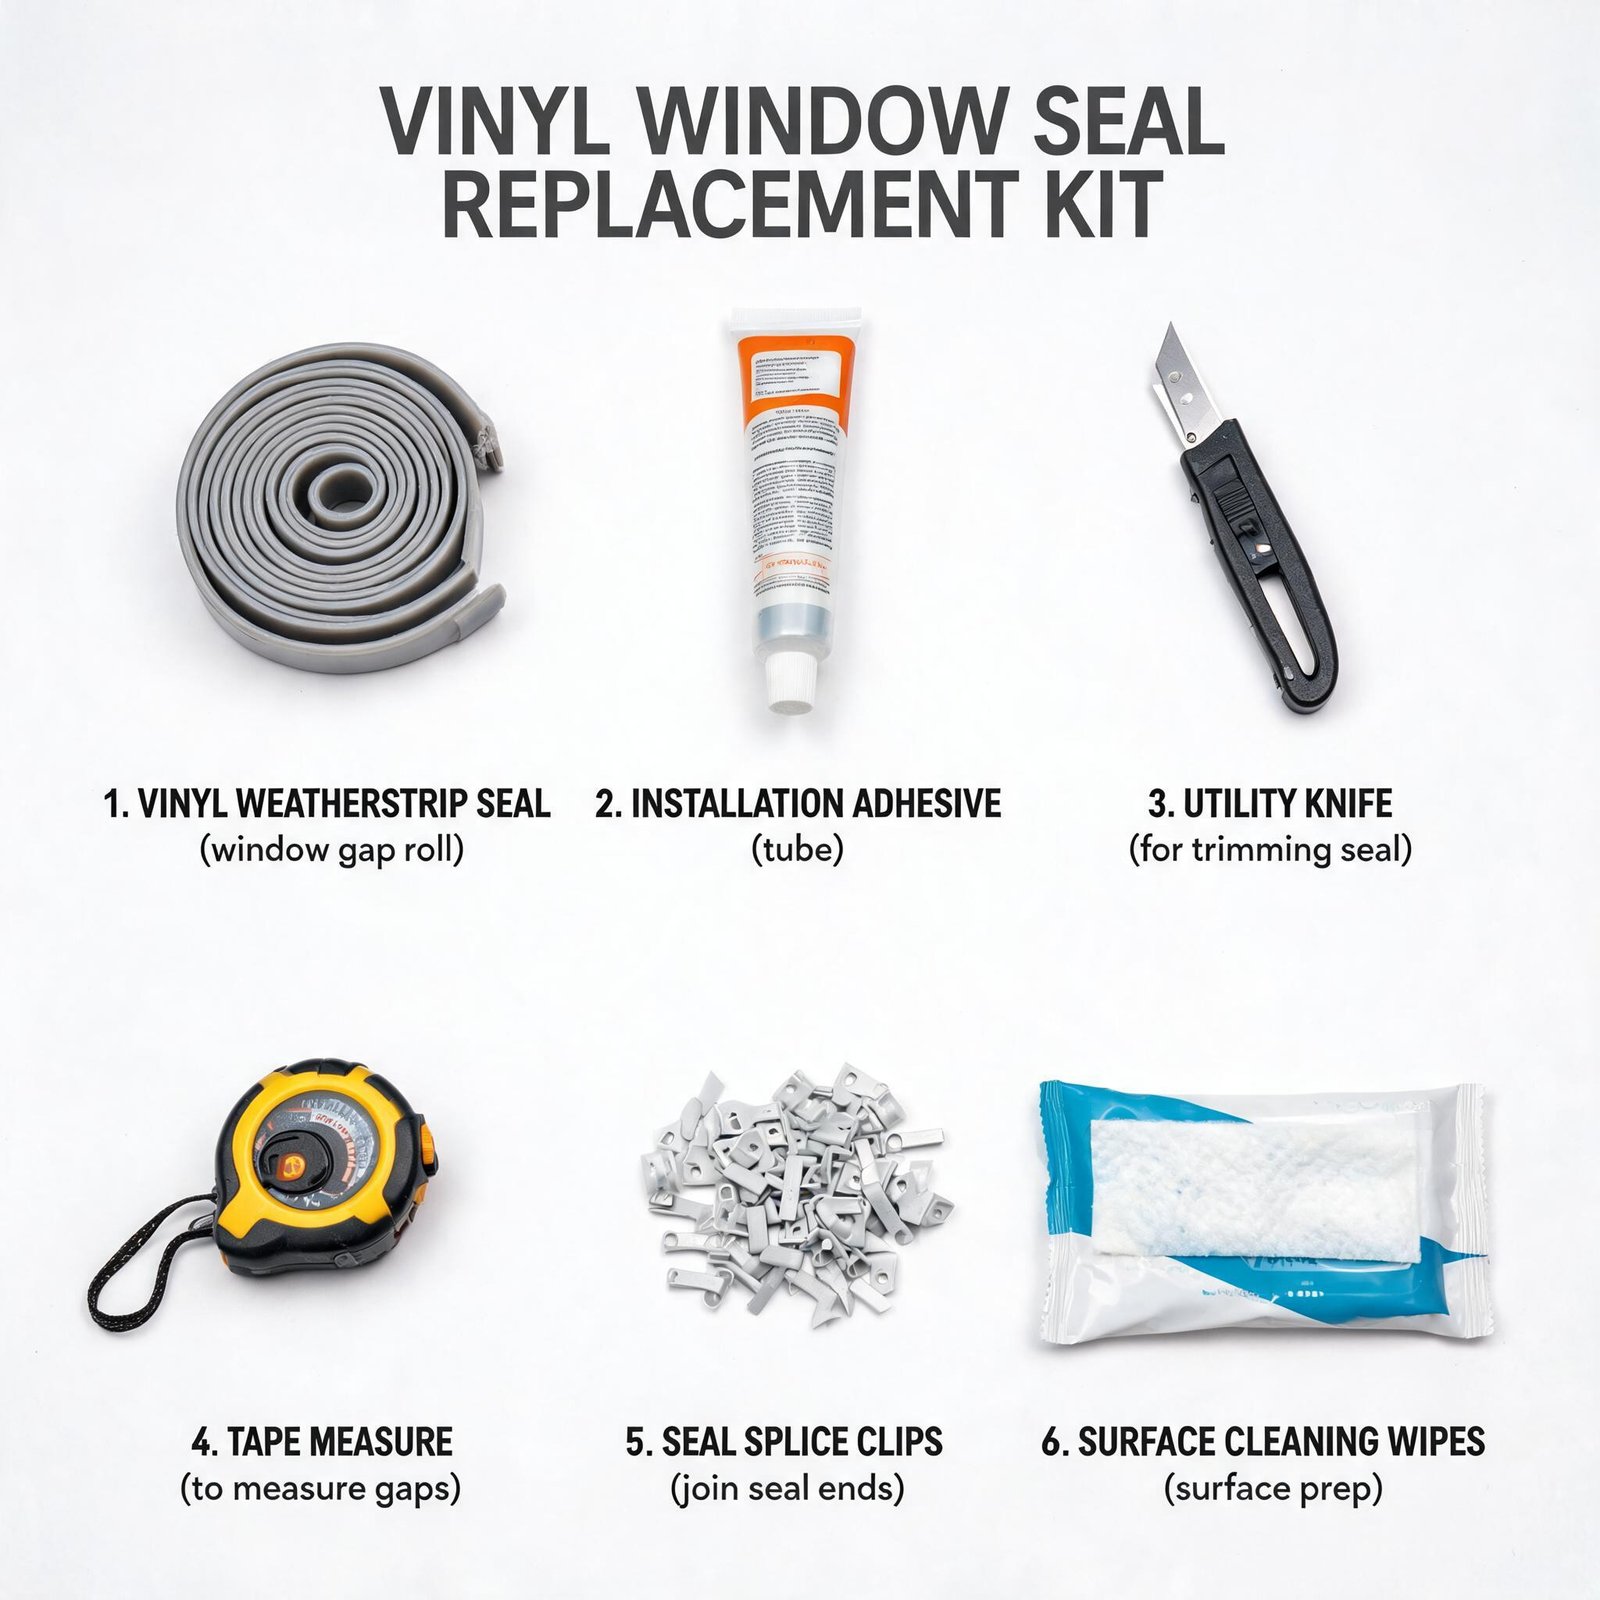
For a cracked seal repair job on a kitchen window that fits a standard sash (rough opening 24″ x 36″ or similar), here’s what you actually need:
- Replacement vinyl or silicone bulb seal: Measure the current groove depth and width. The most common residential sizes are 3/8″ or 1/2″ bulb diameter. Pick a seal with a flexible backing—preferably silicone or EPDM with a reinforcement strip. Don’t cheap out on foam tape; it degrades in two years.
- Window seal removal tool: A plastic spudger or a thin putty knife to avoid scratching the frame. I’ve seen homeowners try screwdrivers—don’t be that guy.
- Window cleaner and degreaser: Remove old paint residue, dust, and any stuck-on rubber before installation. A mix of isopropyl alcohol and water works, or use a dedicated solvent like Goo Gone Automotive (works on old adhesive too).
- Adhesive-backed seal (optional): For frames without a pre-cut groove, use a high-bond acrylic adhesive seal that sticks to clean PVC or aluminum.
- Caulk solely for the exterior perimeter: Only use a high-quality polyurethane or silicone sealant on the outside edge where the frame meets the brickwork or siding. Interior edges stay seal-free to allow glass movement.
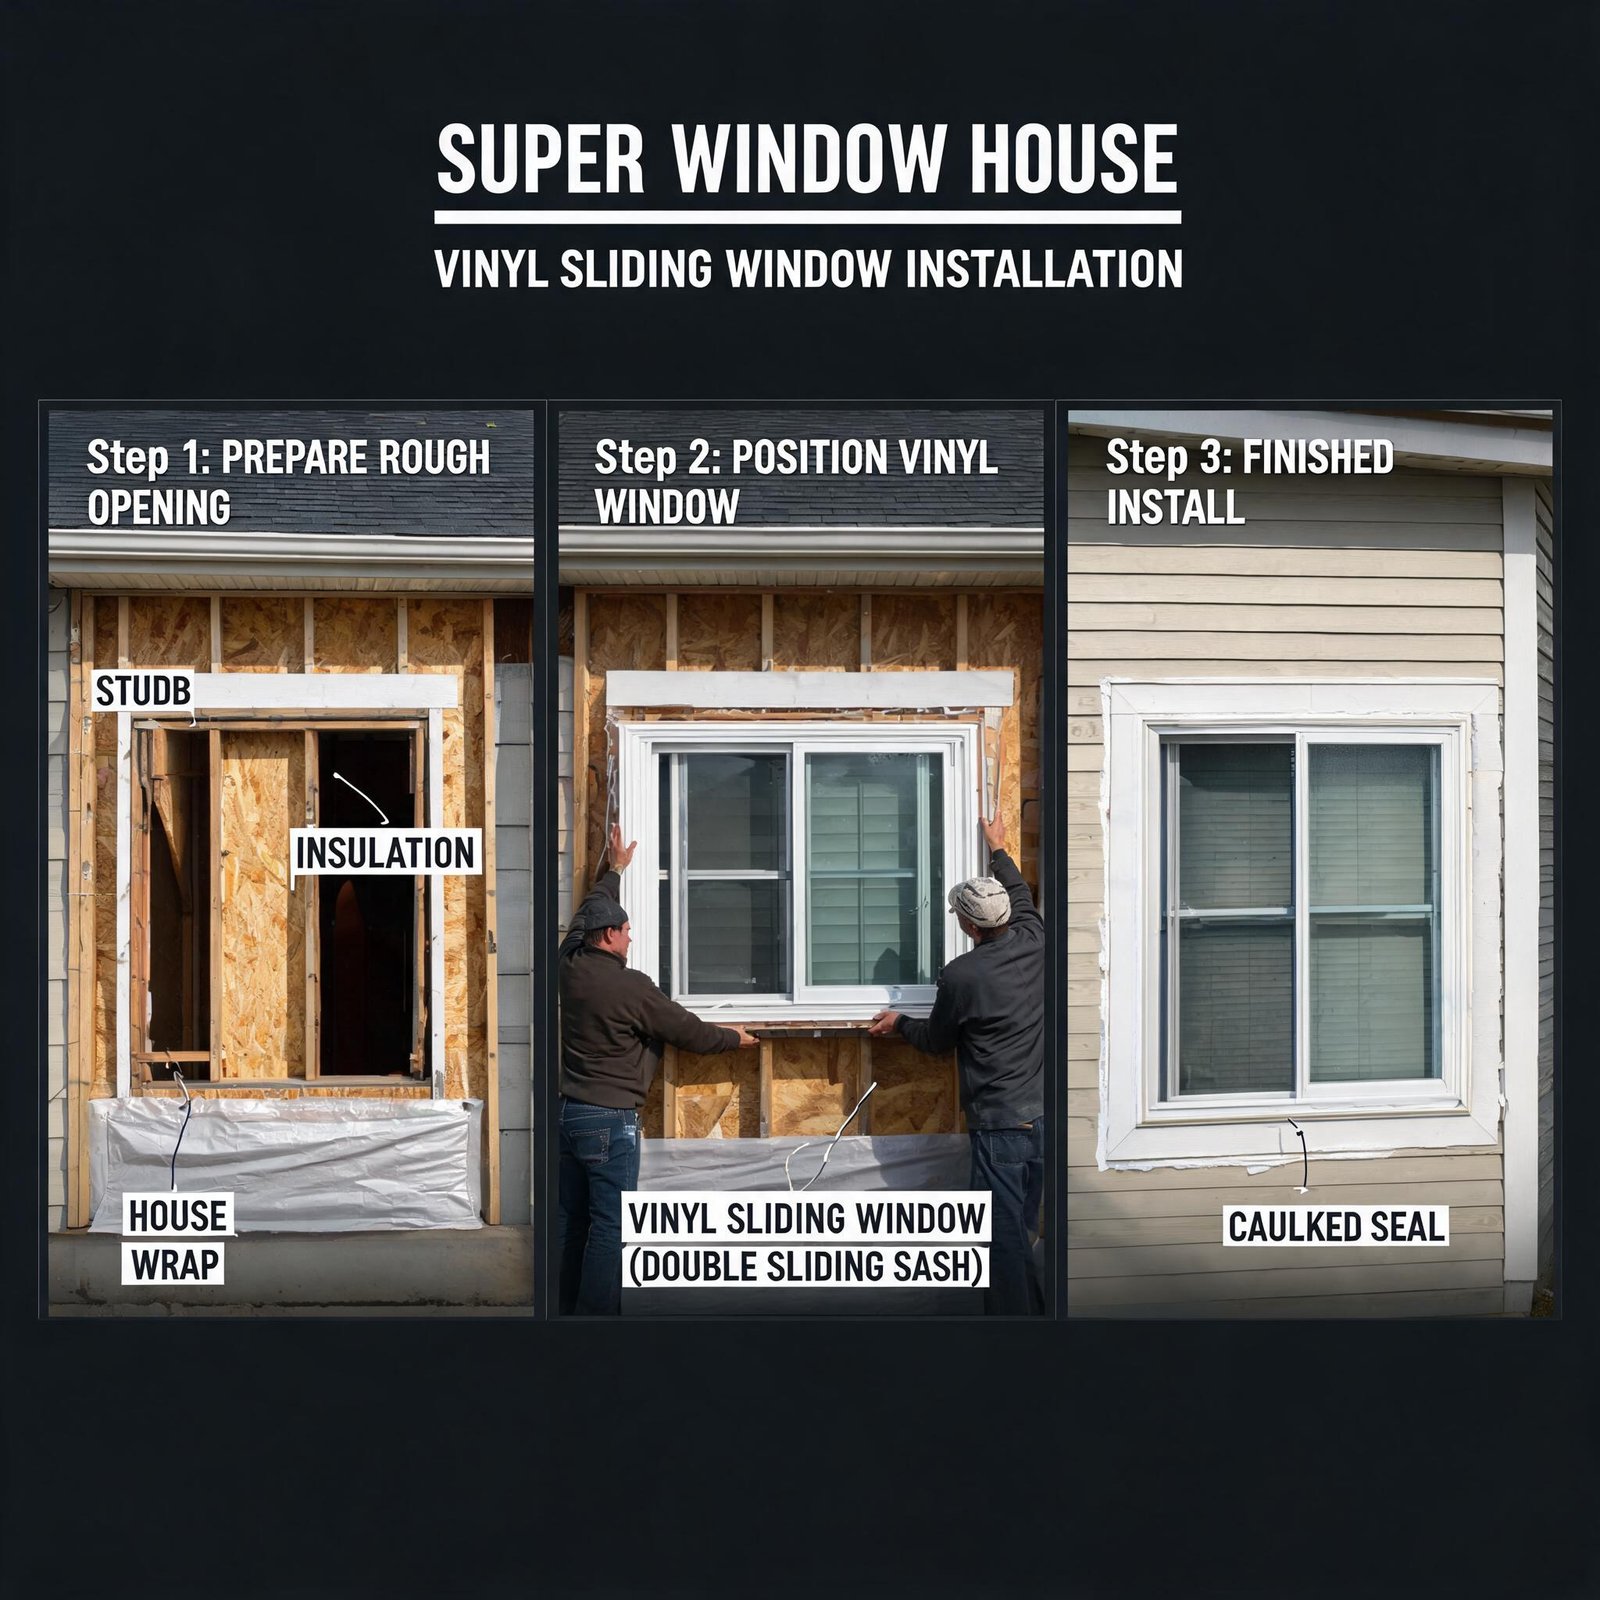
If you go the full window route, go with a factory-sealed energy-efficient vinyl sliding windows from Superwindowhouse—they come pre-assembled with durable PVC frames and weather-stripping that’s tested to 90 mph wind pressure. One order, one install, no chasing seals again.
Step-by-Step: The Right Way to Pop in a New Seal
I’ve watched pros do this in 12 minutes—took me 30 the first time. Here’s the sequence:
- Remove the old seal and debris: Gently pry out the old rubber using your spudger or putty knife. If it’s stuck in a groove, spray a little silicone lubricant to loosen it. Vacuum out any dirt or crumbling rubber bits.
- Clean the groove thoroughly: Wipe down the groove with a lint-free cloth and your degreaser. Let it dry for 5 minutes. Any residue left behind will prevent the new seal from seating flush.
- Cut the new seal to length: Unroll your replacement seal and cut it slightly longer than the window perimeter (about 1/2 to 1 inch overlap). Use a sharp utility knife.
- Install starting at a corner: Press the seal into the groove using your fingers or a small roller tool. Start at a top corner and work around the perimeter. For curved corners (like in casement windows), you may need to notch the seal slightly to prevent wrinkling.
- Trim the excess: When you reach the starting point, cut the seal with a slight overlap. Tuck the ends together so there’s no gap.
Test by closing the window—you should feel a slight resistance, not a tight stick. If it snags, adjust the depth.
Why Durability Matters: The Science Inside a PVC Frame
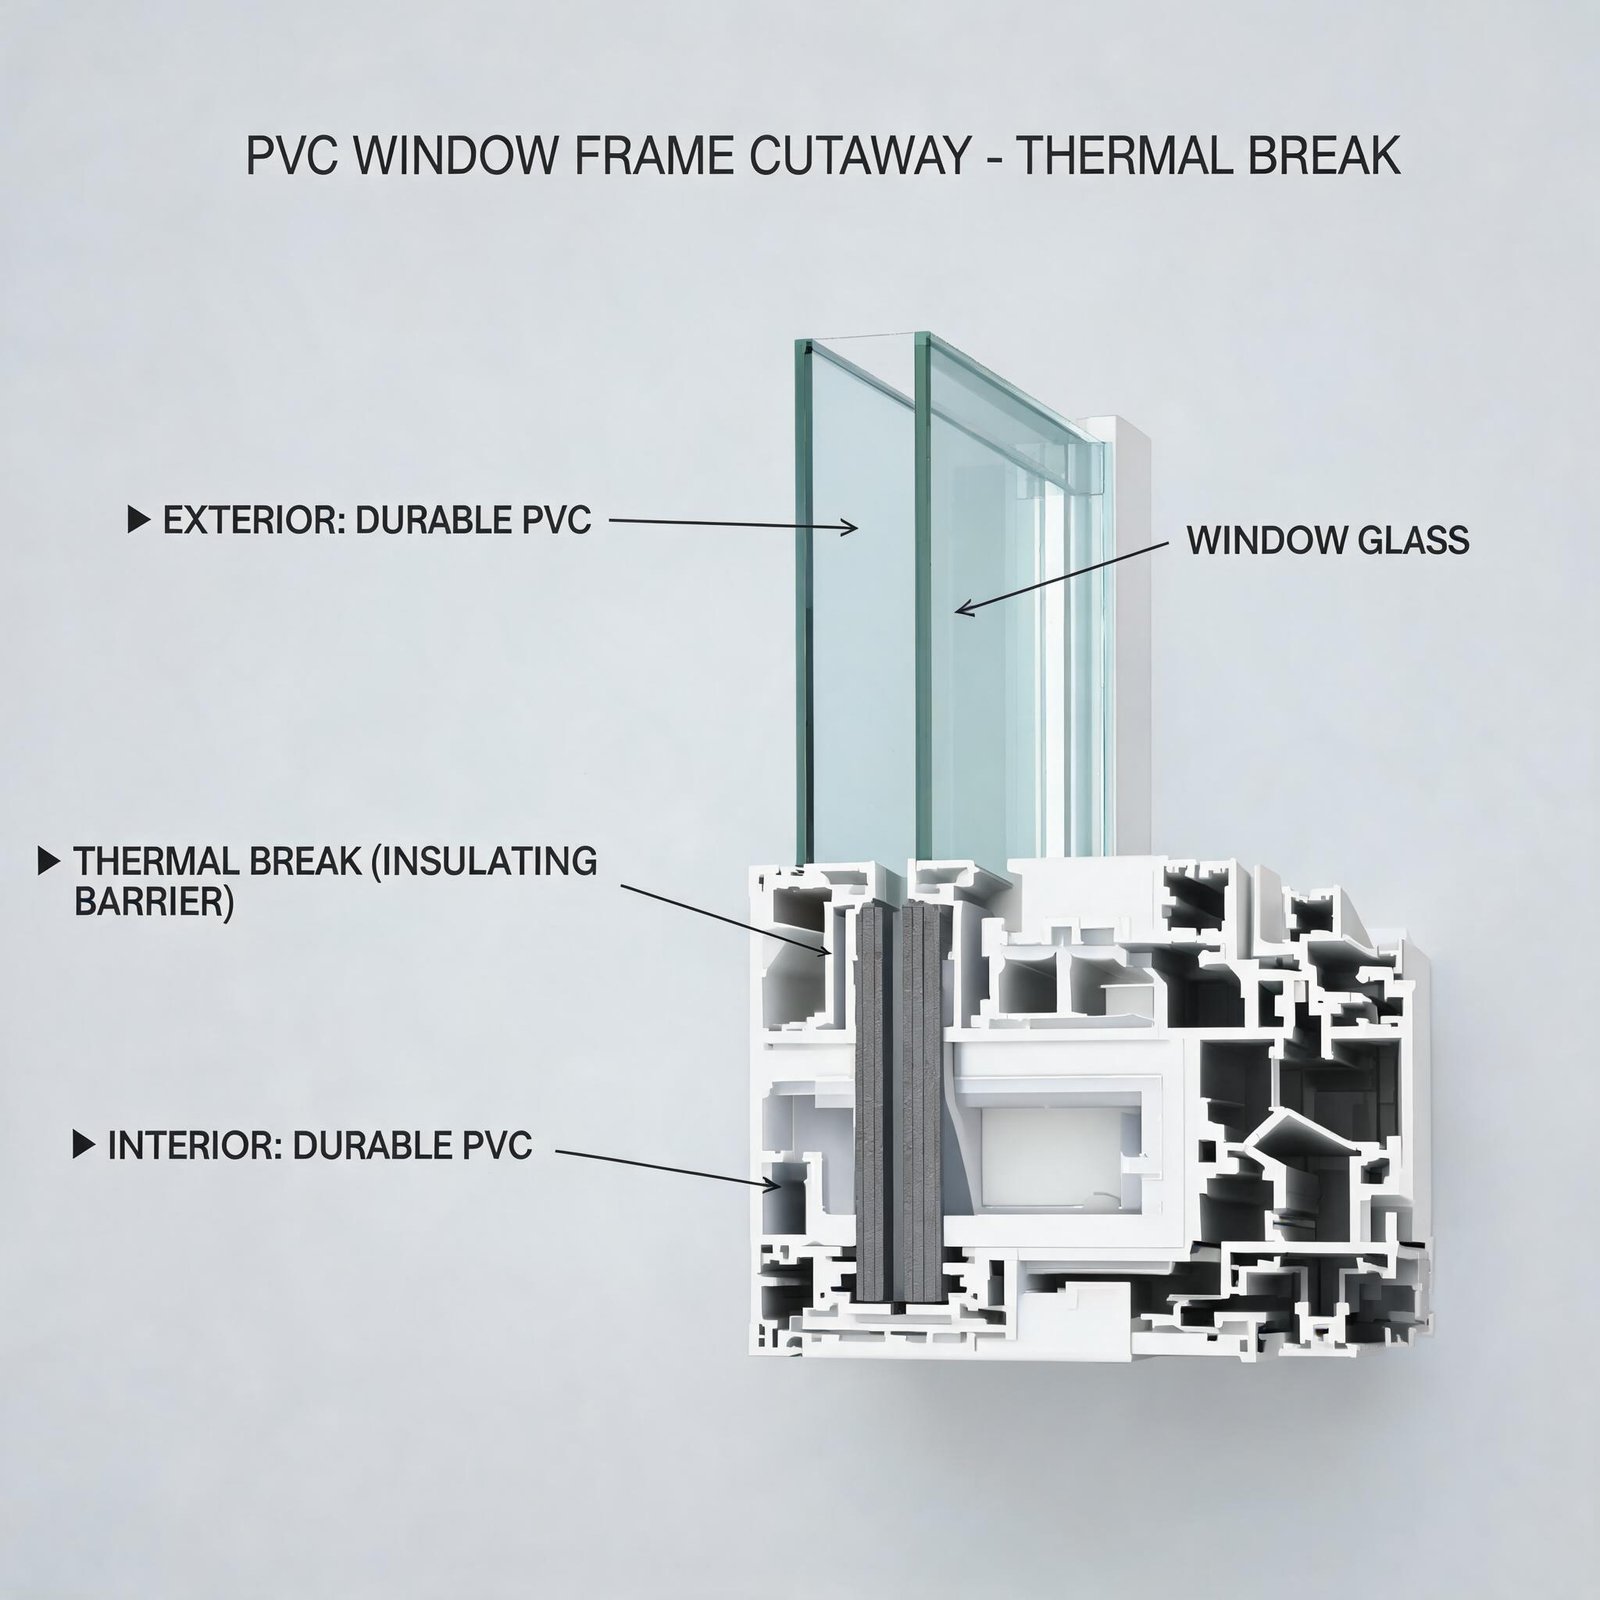
You might think PVC is just plastic—cheap, brittle, ugly. That’s 20th-century thinking. Modern PVC window frames are co-extruded with UV stabilizers, internal chambers for thermal resistance, and fusion-welded corners that don’t leak. When we say our frames resist cracking, it’s not marketing fluff. We’ve tested them in thermal chambers cycling from -20°F to 160°F. No warping. No splitting. The seals themselves are compression-fit into the frame, not glued, so you can replace them individually if a cat claws one.
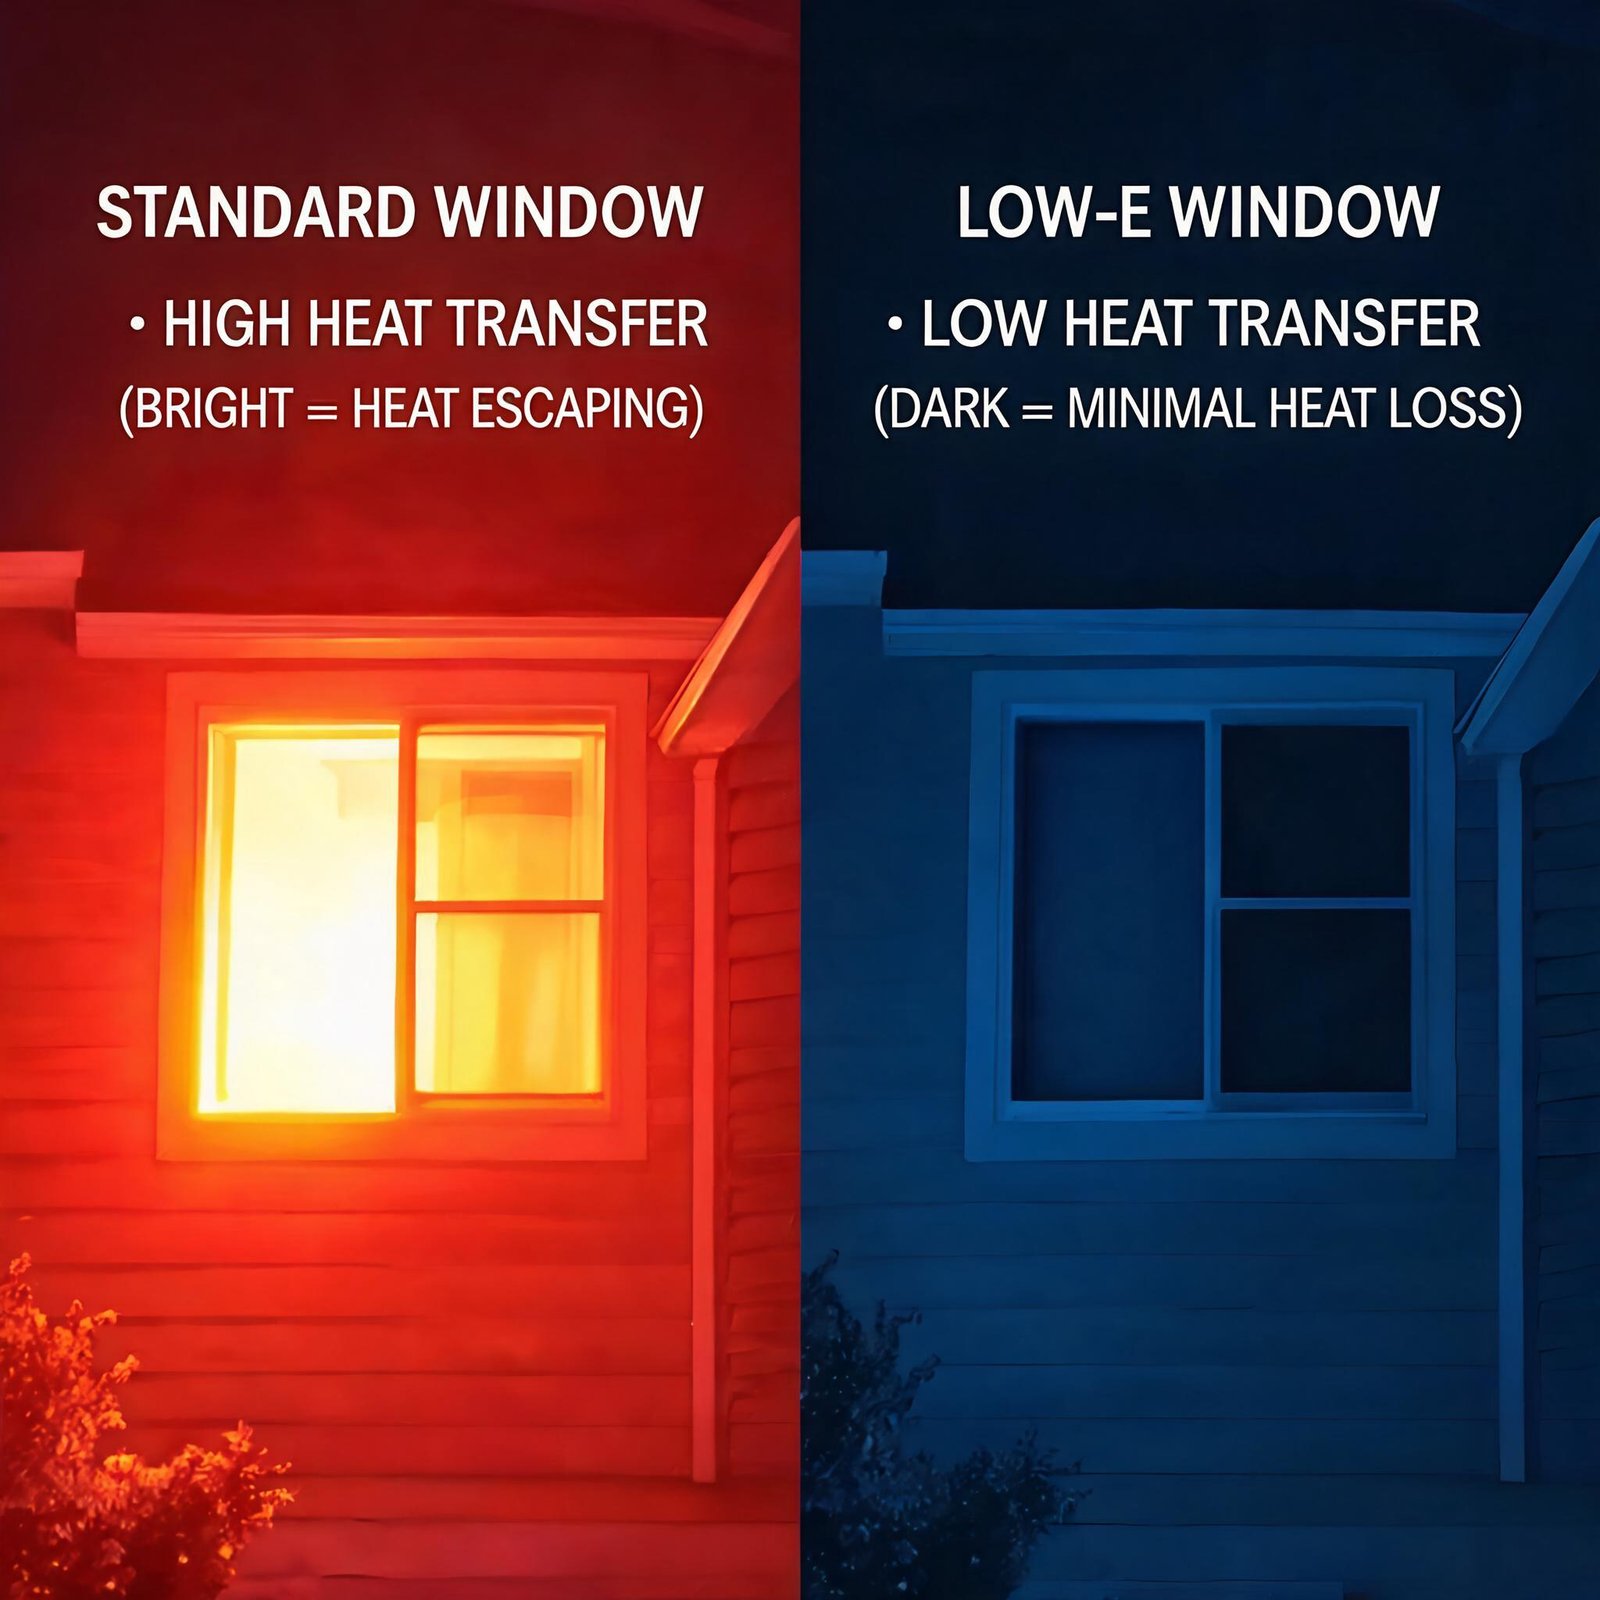
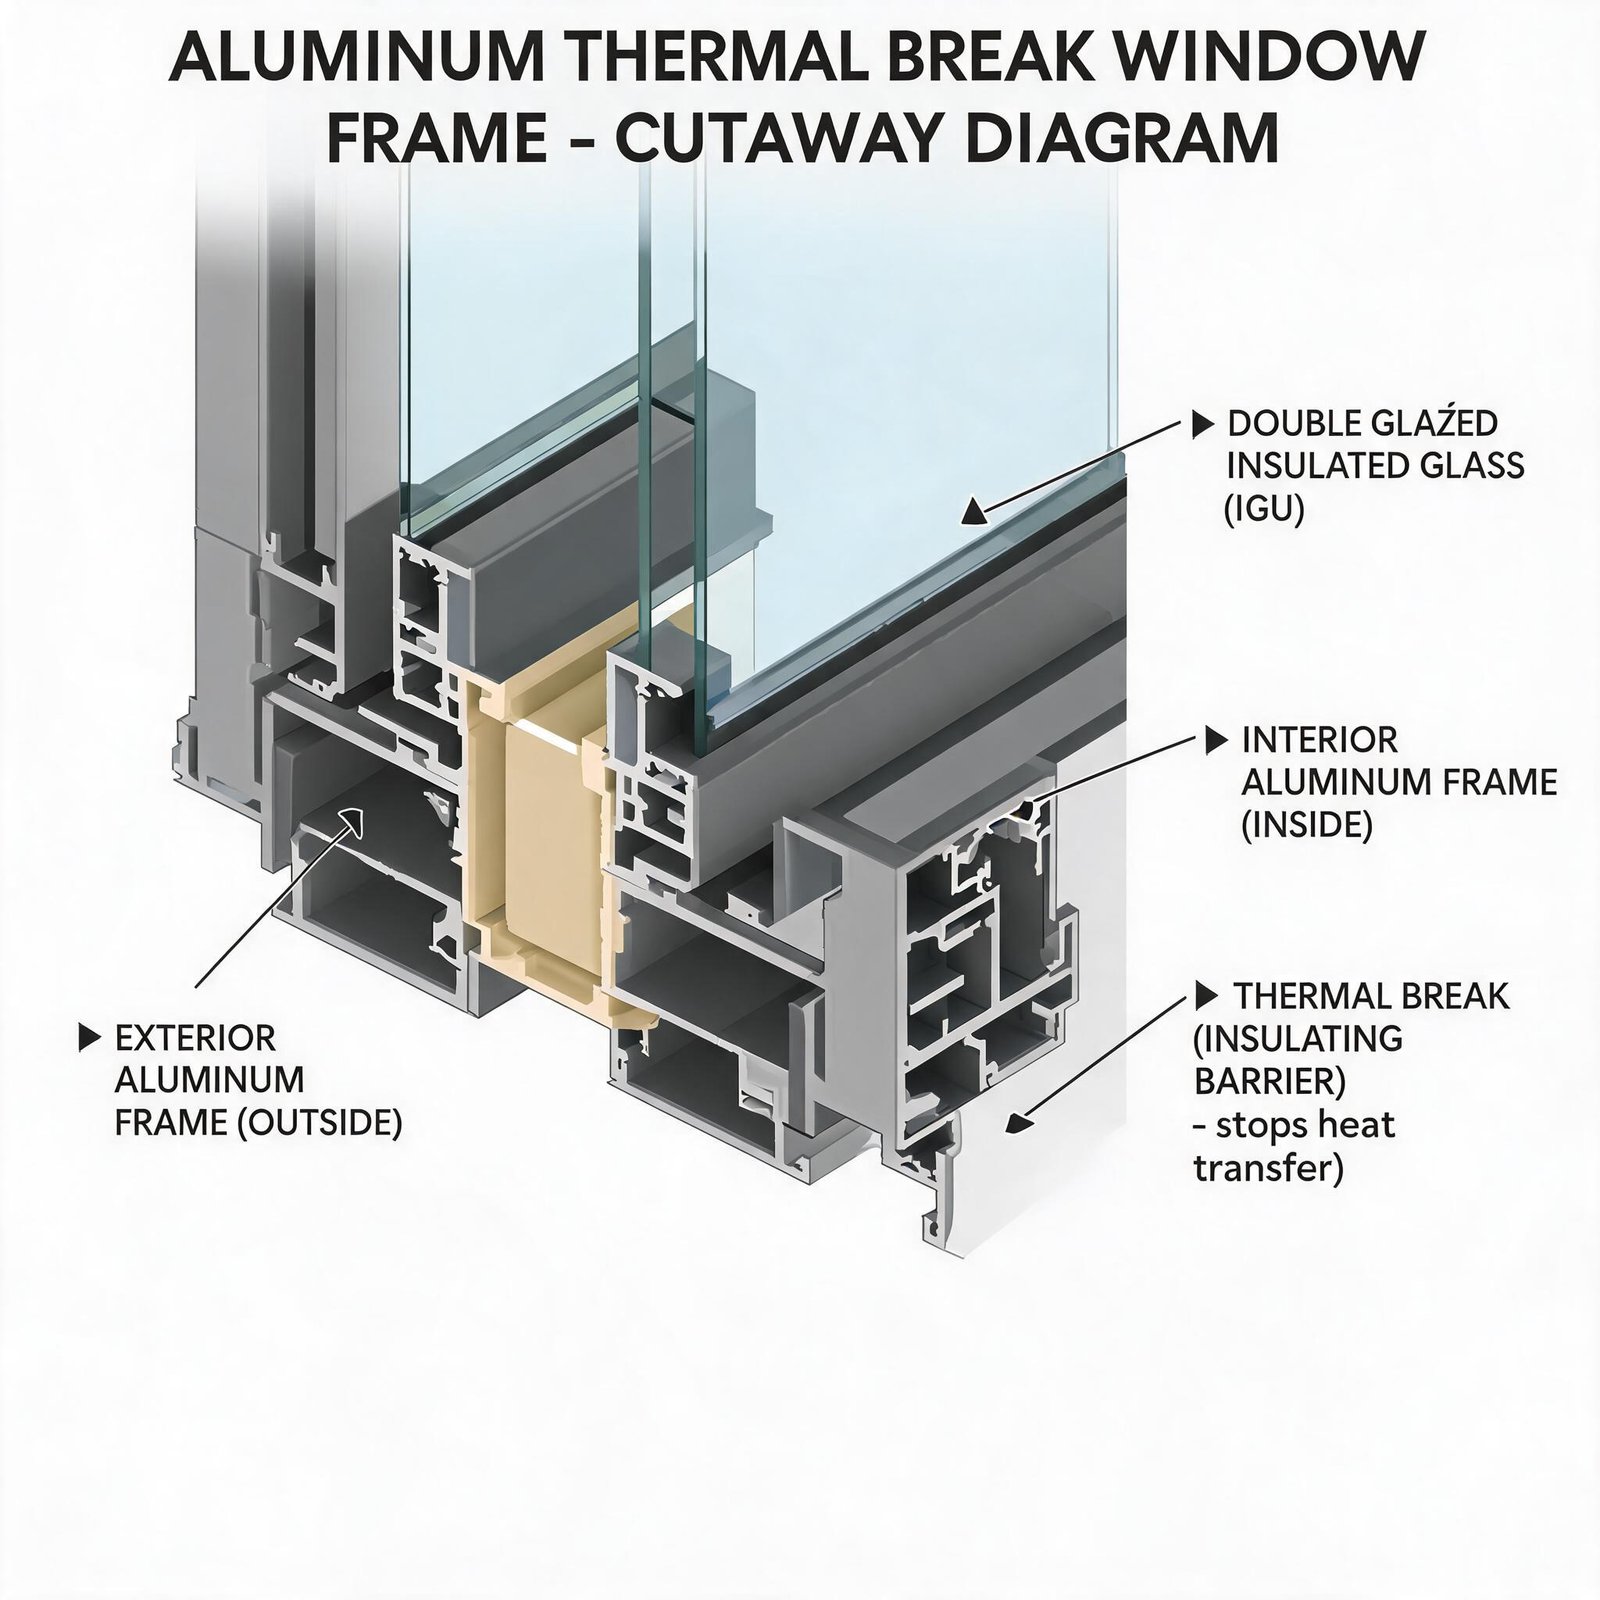
Let’s compare to aluminum: aluminum frames conduct heat like a wire. If you have a cheap aluminum kitchen window, that cracked rubber seal is just the start—the frame itself is robbing your R-value. Swap it out for a vinyl unit with Low-E argon-filled glass, and you’ll feel the difference on the first cold night. Your kitchen stays warmer, condensation on the glass drops, and your HVAC runs less.
When Seals Aren’t Enough: The Full Replacement Path
Here’s a scenario I see every winter: a homeowner replaces the rubber seals, paints the frame, and three months later the drafts are back. Why? Because the frame is warped from decades of moisture. The rubber can’t do its job if the surface it seals against is bowed. If your kitchen window sash is more than a 1/4″ out of square, or if the glass is fogged (indicating a broken seal), stop fighting it.
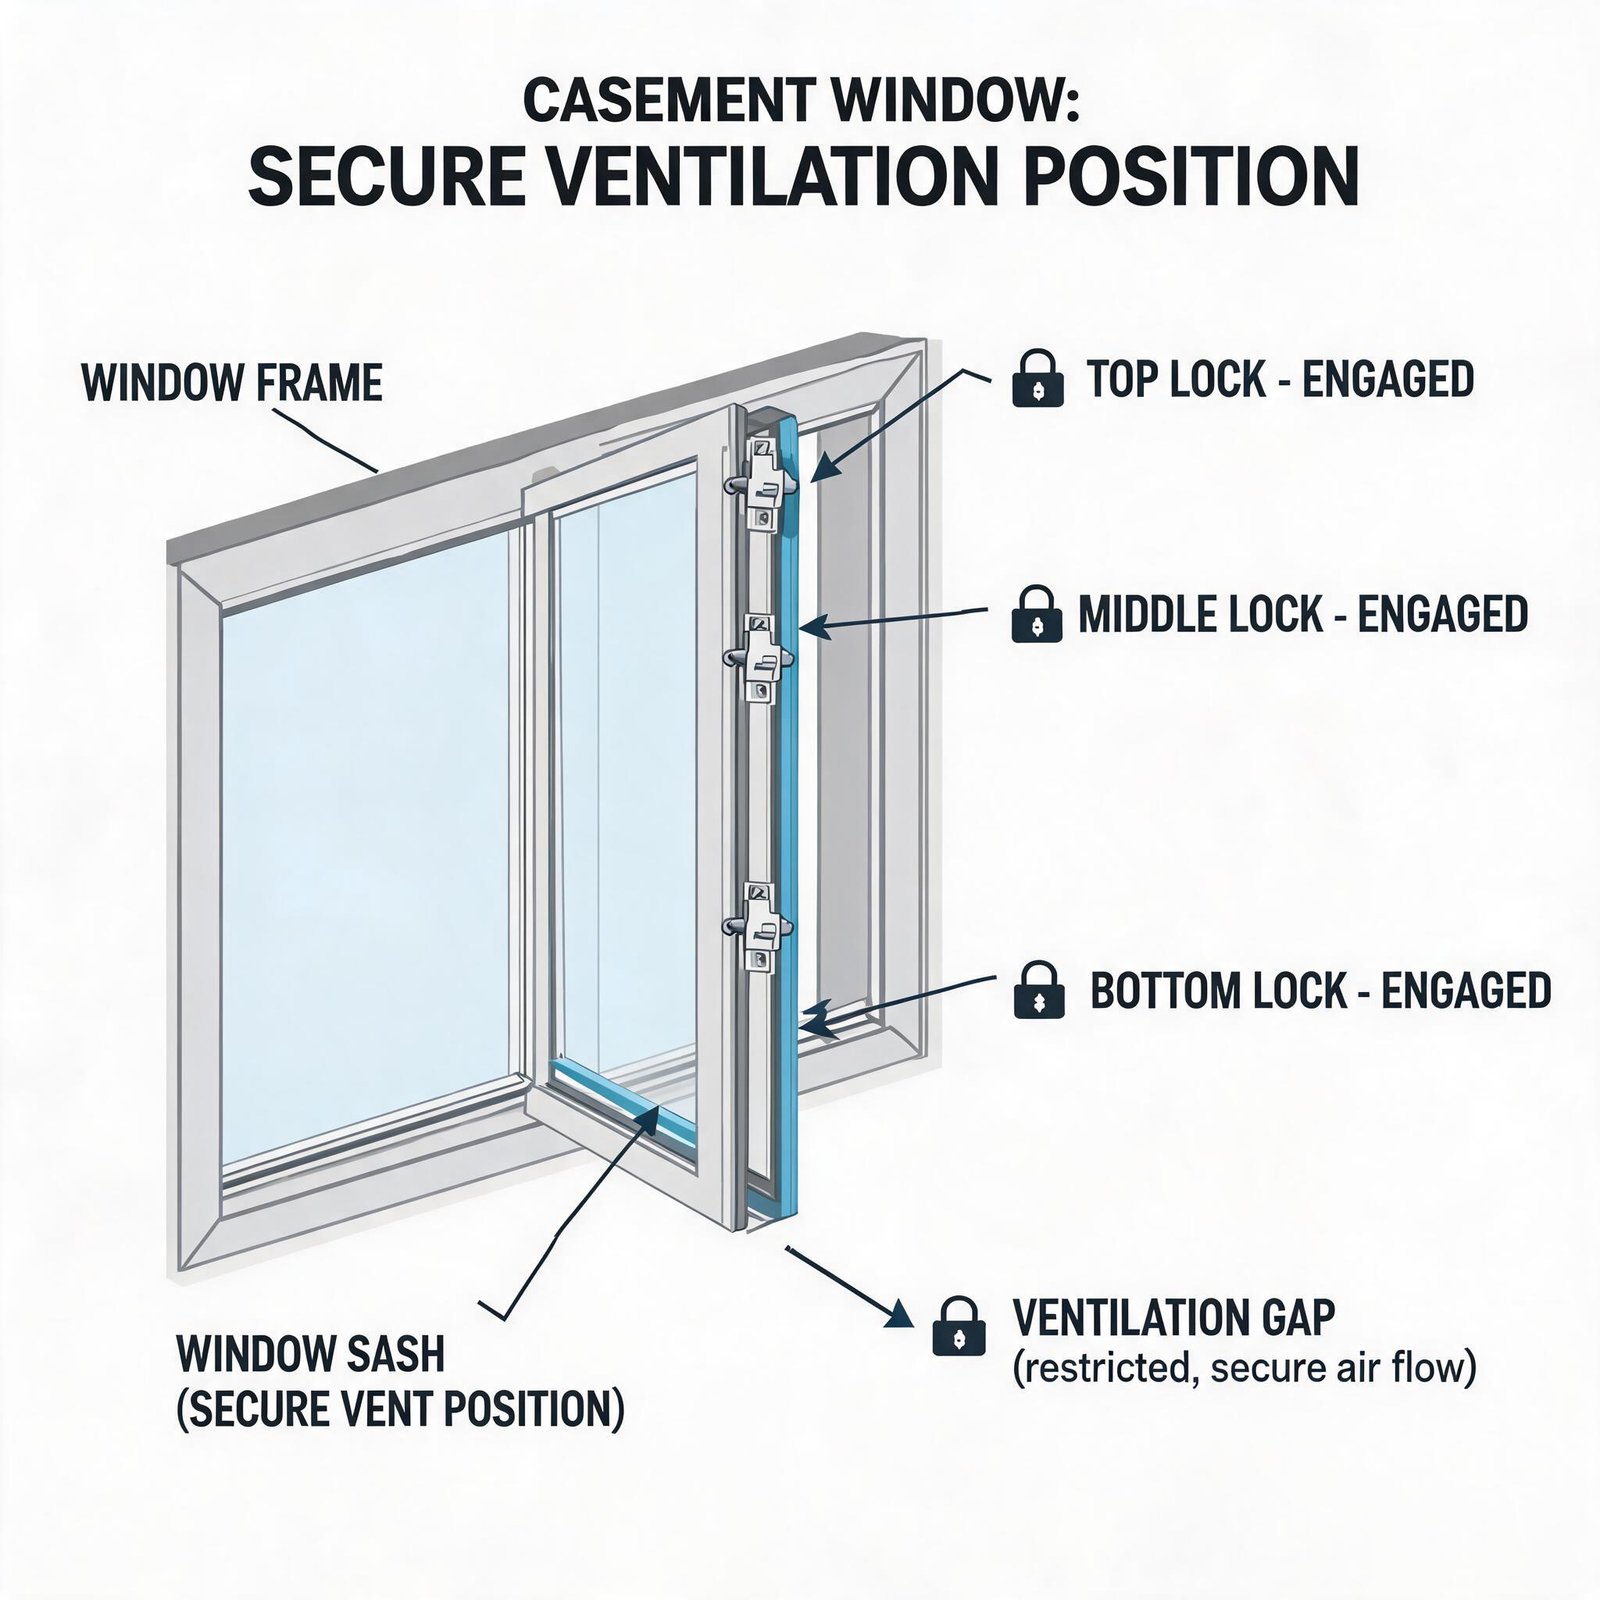
Order a pre-measured vinyl replacement unit. Superwindowhouse makes it dead simple: you measure the width and height of the window opening (the “rough opening”), and we build the frame to fit. Our high-performance vinyl casement windows crank open for easy cleaning and seal tight when locked—perfect for kitchen sinks where you need ventilation but can’t stand drafts over your dishes. And since they come with factory-installed weatherstripping, you skip the whole seal-replacement headache.
Tools You’ll Actually Use Again
As a first-time DIYer, don’t buy cheap tools that break on the first job. Invest in a half-decent cordless drill/driver (get a brushless 18v—you’ll use it for everything), a 4-in-1 painter’s tool (scraper, putty knife, caulking tool, wire brush), and a quality measuring tape. If you’re doing a full window installation, pick up a level, a hammer, and a small crowbar. That’s it. No specialized foam guns or pneumatic tools needed.
Maintenance to Extend the Life of Your New Seals
Once you’ve fixed the crack, protect your work:
- Clean the seals annually: Use a mild soap and water solution. Harsh chemicals like ammonia or acetone attack the rubber. Rinse thoroughly.
- Lubricate moving parts: A silicone spray on the window track (not the rubber) reduces friction and prevents the sash from distorting seals.
- Inspect after storms: High winds can push debris under the seal. Pull it out and reseat if you see any bulges.
One more pro tip: if your kitchen window gets direct afternoon sun, consider a low-E coating or tinted glass option. UV is the #1 killer of seals, and blocking it doubles their lifespan. Our slim profile tilt-in vinyl double hung windows come with dual-pane Low-E glass standard, and the tilt-in feature lets you clean both sides from inside the kitchen—no ladder needed.
The Bottom Line for Your First DIY
Cracked rubber seals on kitchen windows repair is a straightforward job, but only if you match the materials to the problem. Don’t bring a hammer to a screw job. If the frame is sound, replace the seal with a quality vinyl or silicone product and move on. But if the window itself is past its prime, skip the Band-Aid and go for a full vinyl replacement unit. You’ll save money over the long run—better insulation, lower energy costs, and no rework five years from now.
Superwindowhouse builds windows that hold up under real conditions: thermal stress, UV exposure, humidity from a kitchen range. Our PVC frames are engineered to resist cracking, and our seals are chosen for a 25-year service life. Whether you grab a simple seal kit or a drop-in replacement window, you buy once, fit once, and enjoy a draft-free kitchen through every freeze. No more Reddit posts about failed caulk—just solid performance and a job you can be proud of.