Water in a sliding-window track does not automatically mean the window is leaking. Sliding units are commonly designed to collect incidental rainwater in the exterior track and discharge it through internal drainage paths and weep holes. A real problem exists when water remains trapped for an extended period, overflows toward the interior, appears on drywall or trim, enters during light rain, or causes dampness around the rough opening. In most cases, diagnosis should begin with drainage holes and track debris, then move to sash alignment, weatherstripping, exterior sealant, installation details, and the product’s suitability for the opening’s exposure. This guide helps builders, contractors, architects, property managers, and wholesale buyers identify the likely source before selecting parts, requesting service, or specifying replacement windows.

Why Sliding Windows Leak When Casement Windows Don’t
A hinged window generally closes by compressing seals between the sash and frame. A horizontal sliding sash needs clearance to move on its track, so it typically relies on several coordinated water-management features rather than a single compression seal.
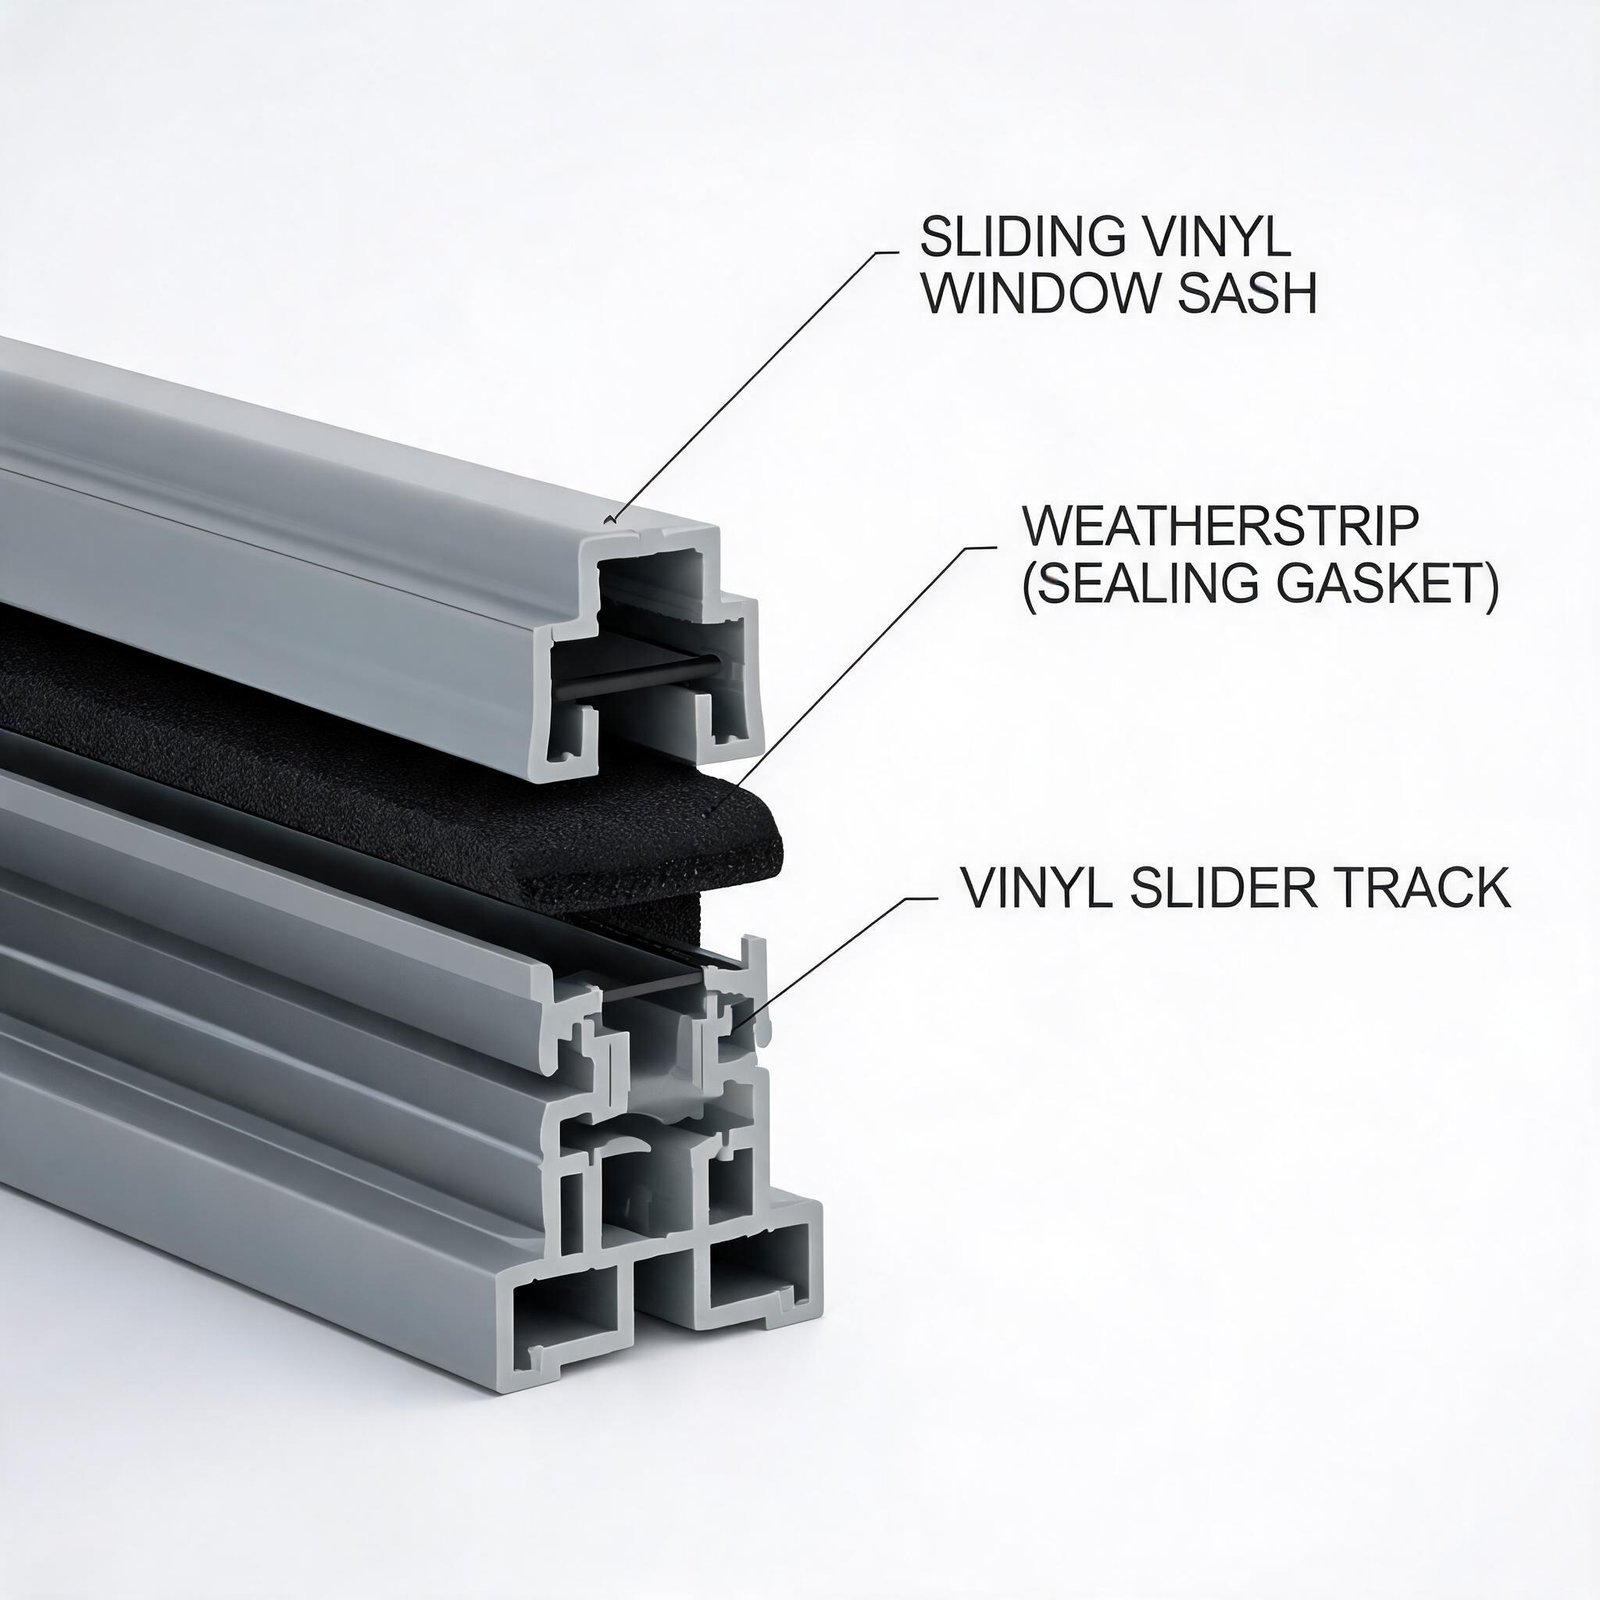
That moving clearance is an important engineering consideration. Sliders manage weather through a coordinated set of features rather than a single gasket line:
- Interlock stiles that overlap where sliding sashes meet and help resist water entry
- Pile or co-extruded weatherstripping that reduces air and water movement around the moving sash
- A raised interior leg (water dam) intended to limit overflow toward the room
- A sill drainage channel that guides incidental water toward the exterior
- Weep holes or drainage outlets that allow collected water to leave the frame
If one part of this system is blocked, worn, damaged, misaligned, or incorrectly installed, the window may still look acceptable and operate normally in dry weather while performing poorly during heavy or wind-driven rain.
Normal Track Water vs. Actual Water Intrusion
A small volume of water sitting in the exterior track after a storm can be normal. In many sliding-window systems, that track is part of the intended drainage path.
You have an intrusion problem when any of these appear:
- Water inside window track on the interior side of the sash or beyond the interior water dam
- Overflow onto the interior sill, drywall, trim, or floor below the frame
- Water entry during light rain, which can indicate a seal, perimeter, or installation-detail issue
- Wet sheathing, staining, soft materials, or rot at the rough opening
- Musty odor or recurring moisture near the unit between storms
Separate those two categories first. Cleaning and restoring drainage may solve a maintenance issue, while interior overflow or moisture around the wall opening requires a broader inspection of the window, installation, and exterior wall interface.
Sliding Window Weep Holes and Drainage Holes: The Primary Discharge Path
Weep holes are small openings at or near the exterior portion of the sill frame. Their exact shape, location, quantity, and internal drainage route vary by manufacturer and window system, but their purpose is consistent: allow water collected in the drainage area to exit to the exterior.
Their job is singular: let water leave the track before it can back up toward the interior.
How to Clear Clogged Weep Holes
- Identify the drainage outlets shown in the window manufacturer’s installation, operation, or maintenance instructions. Look along the exterior sill face and exterior track, not only at the room-side track.
- Remove loose debris with a soft nylon brush, a non-damaging probe, or low-pressure air. Avoid aggressive drilling, cutting, or forcing metal tools into the opening, because this can damage the frame, baffles, or weatherstripping.
- Flush the channel gently with clean water and observe whether water exits outdoors. Do not direct high-pressure water at seals, joints, or the wall opening.
- Check that siding, trim, paint, sealant, insect debris, landscaping material, or a retrofit detail has not covered the exterior outlets.
- Confirm that water is moving toward the exterior drainage path. If it pools repeatedly despite visible cleaning, stop modifying the frame and consult the manufacturer’s installation manual or a qualified window professional.
When the Holes Are Clear But Water Still Backs Up
If weep holes appear open but water still pools, the restriction may be inside the frame or may result from the installation rather than from surface dirt:
- Insect nests or debris inside an inaccessible drainage chamber
- Manufacturing debris or sealant contamination obstructing an internal path
- A damaged internal baffle or drainage component within the frame system
- Frame distortion, settlement, or out-of-level installation that prevents intended drainage
- A window system not suited to the opening’s rain and wind exposure
Drainage capacity depends on the complete tested system, including frame geometry, baffles, sash configuration, size, installation, and exposure. Do not assume that a visible sill dimension alone predicts performance. If an internal path cannot be cleared without disassembling the unit, consult the manufacturer’s service guidance before deciding whether repair, component replacement, or full replacement is appropriate.

Full Diagnostic Sequence for Water Coming Through a Sliding Window
Work in this order. It helps distinguish a simple maintenance issue from a sash, installation, or wall-interface problem.
| Step | Check | Pass Criteria | Failure Indicates |
|---|---|---|---|
| 1 | Weep holes | Water exits freely when gently flushed | Surface clog or possible internal blockage |
| 2 | Sill channel | No persistent standing water after normal drainage time | Drainage restriction, inadequate slope, or capacity concern |
| 3 | Interior leg height | Water remains on the exterior drainage side with no overflow marks | Overflow, frame damage, or system-design concern |
| 4 | Weatherstripping | Continuous contact with no obvious tears, flattening, or gaps | Worn or damaged weatherstripping |
| 5 | Interlock engagement | Sashes close evenly with no obvious gap or looseness | Sash or roller adjustment issue |
| 6 | Roller operation | Smooth travel without excessive drag, wobble, or sagging | Worn rollers, track damage, or sash misalignment |
| 7 | Perimeter sealant | Continuous, adhered exterior joint where the design calls for sealant | Failed sealant or frame-to-wall joint issue |
| 8 | Sill pan / flashing | Installation details direct incidental water outward and remain intact | Installation-detail or wall-interface failure |
| 9 | Frame level & plumb | Frame conforms to the manufacturer’s installation tolerances | Installation error, distortion, or settlement |
| 10 | Exposure rating | Product documentation matches project requirements and opening conditions | Potentially unsuitable product specification |
Reading the Results Correctly
Steps 1–3 focus on drainage. Steps 4–6 focus on the sash, seals, and alignment. Steps 7–10 focus on the building-envelope interface and product selection.
A unit can drain correctly yet still leak if the rough opening, exterior sealant, flashing, or adjacent wall materials are failing. Conversely, a properly detailed opening cannot compensate for a blocked track or a sash that no longer engages its weatherstripping. Identify the category before ordering parts or applying sealant.
Weatherstripping, Interlock Seals, and the Silicone Sealant Trap
Weatherstripping is an important first line of defense and can wear from ultraviolet exposure, temperature changes, contamination, and repeated sash movement. Inspect for brittle material, flattened pile, loose sections, tears, or visible gaps when the sash is closed.
Replace weatherstripping with the exact OEM profile or a manufacturer-approved equivalent. Generic felt, oversized foam, or an incorrect pile height can affect sash clearance, operation, interlock engagement, and drainage. Contractors and property managers should retain the window model information and replacement-part details supplied with the original unit.
Where Silicone Sealant Actually Belongs
Exterior-grade sealant may be part of the frame-to-wall joint or exterior trim detail when specified by the manufacturer and wall system. It is not a substitute for the window’s designed drainage path.
Do not apply sealant inside a sill drainage channel or over a weep hole. Blocking a designed drainage outlet can retain water in the frame and redirect it toward vulnerable joints or the rough opening.
Two rules for every crew:
- Never caulk a weep hole. Keep manufacturer-designed drainage outlets open and visible.
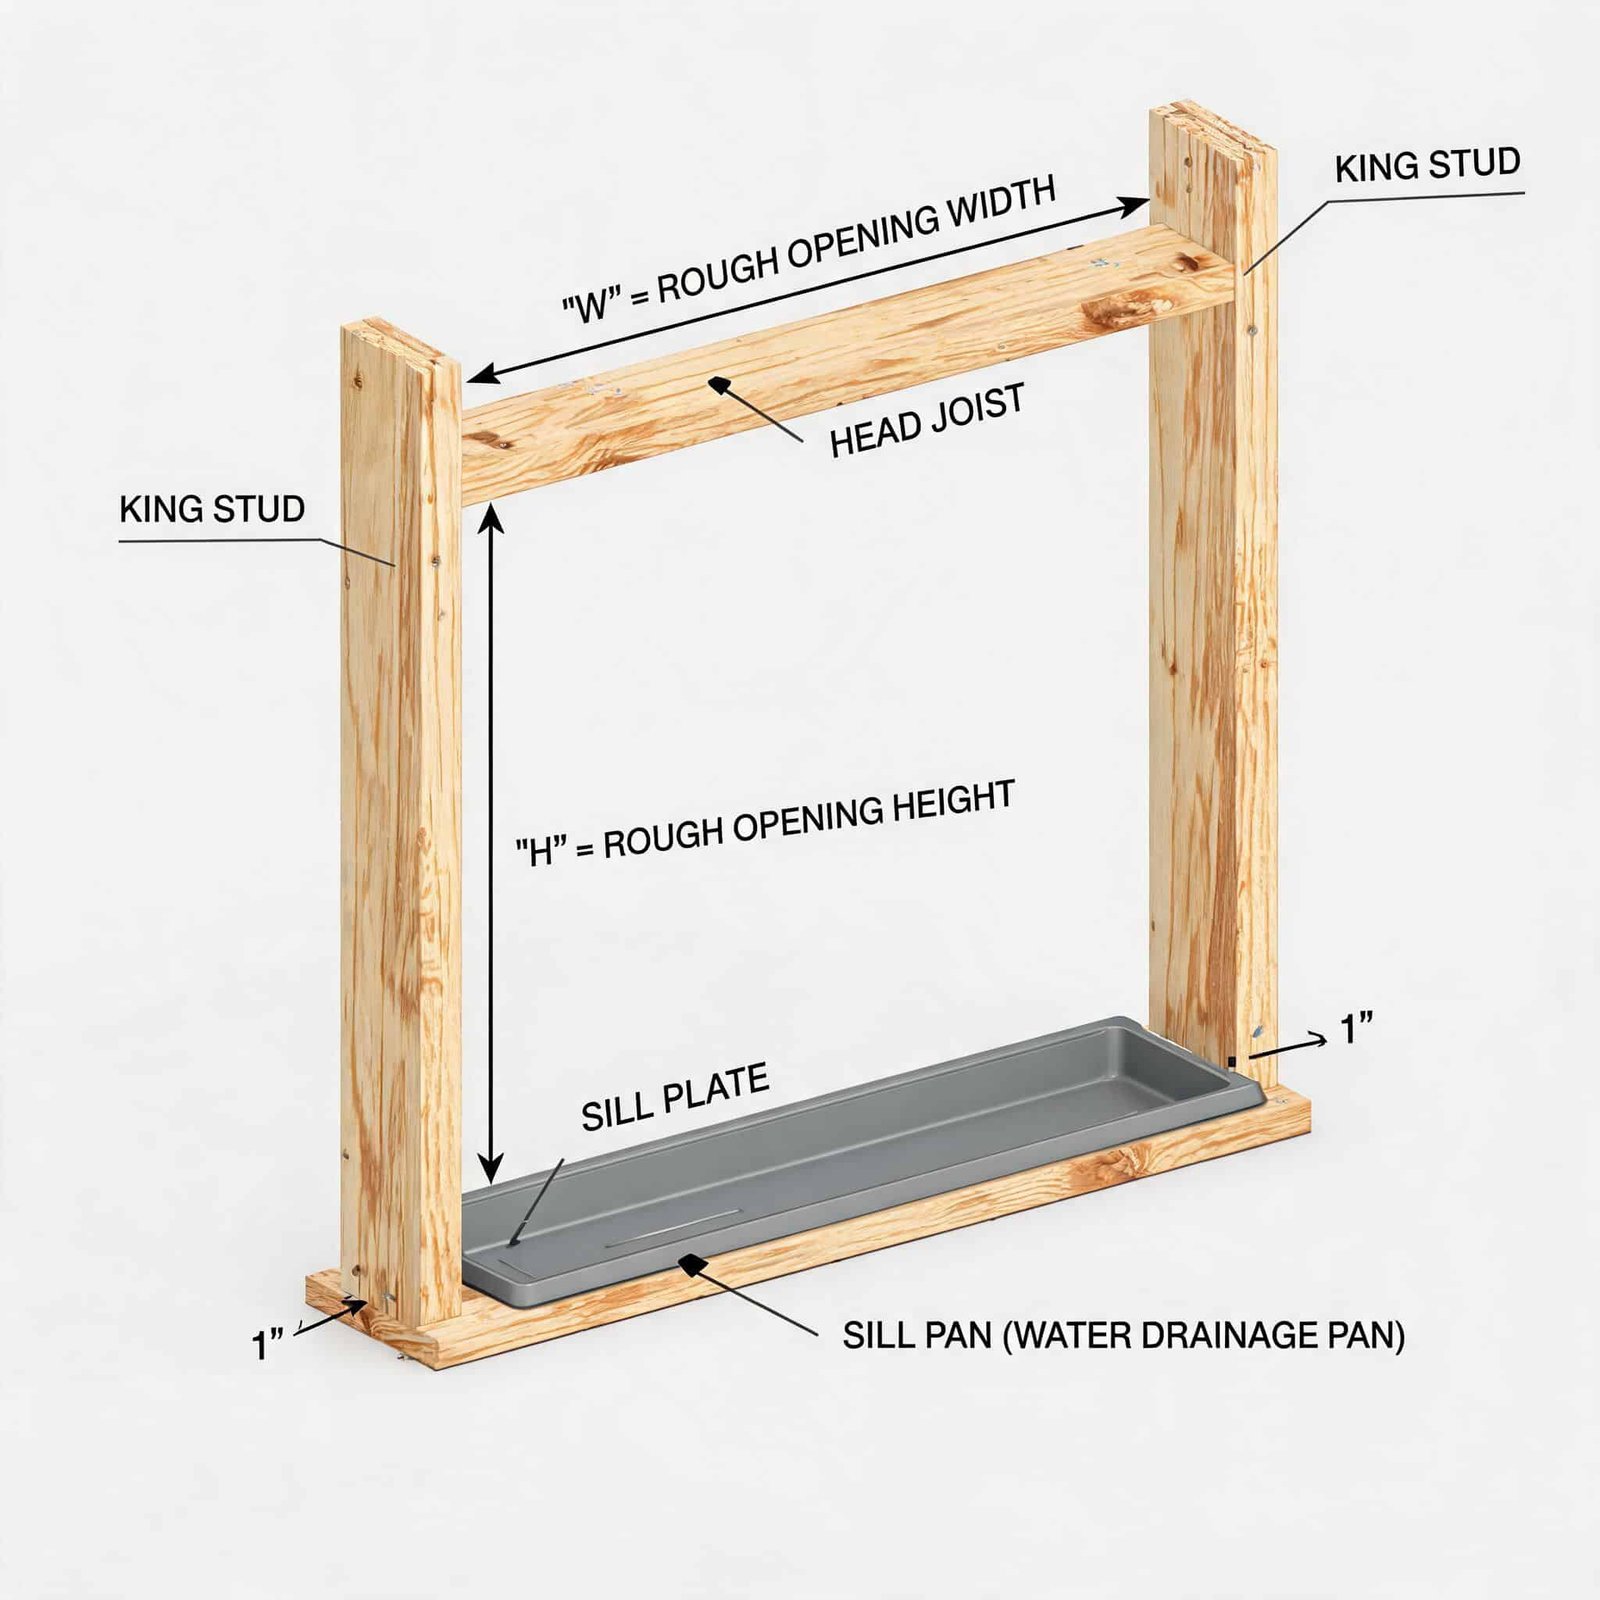
- Never bridge a sill pan end dam. Follow the approved flashing sequence so incidental water can drain outward rather than into the wall.
For frame-to-wall joints, use the sealant type, joint design, backer material, and application method specified by the window manufacturer and the project envelope details. Clean, dry, properly prepared substrates are essential. Excess sealant behind trim can hide the source of a leak or interfere with intended drainage.

The Installation Failures That Void Every Window Warranty
Installation-related problems are a common cause of water complaints, but warranty coverage and installation requirements vary by manufacturer. Review the written warranty and installation instructions before concluding that a particular detail voids coverage. The following details commonly deserve attention.
- Sill pan. Where required by the project, manufacturer, or local code, a sill pan and associated end dams should be detailed to direct incidental water to the exterior and integrate with adjacent flashing.
- Head flashing. Head flashing and weather-resistive barrier layers should be installed in a water-shedding sequence appropriate for the wall assembly. Follow local code, approved plans, and manufacturer instructions.
- Frame shimming and fastening. Improper shimming, over-tightened fasteners, or fastening in prohibited locations can distort the frame and affect sash alignment or drainage. Use only approved fastening locations and installation tolerances.
- Sealant joint geometry. Sealant applied to wet, dusty, poorly prepared, or incompatible surfaces may fail prematurely. Use compatible materials and the joint configuration specified for the assembly.
A controlled post-install water check can help identify obvious drainage or perimeter issues before interior finishes are damaged. The method, water pressure, duration, and acceptance criteria should be selected by the project team and should not be represented as a substitute for a certified field-performance test unless the applicable standard and qualified personnel are used.
Specifying a Unit That Doesn’t Leak: PG, DP, and NFRC Data
Lowest-cost selection can create risk when the product is not appropriate for the opening size, building height, local wind exposure, rain exposure, or project requirements. Product selection should be based on documented performance for the actual configuration being purchased.
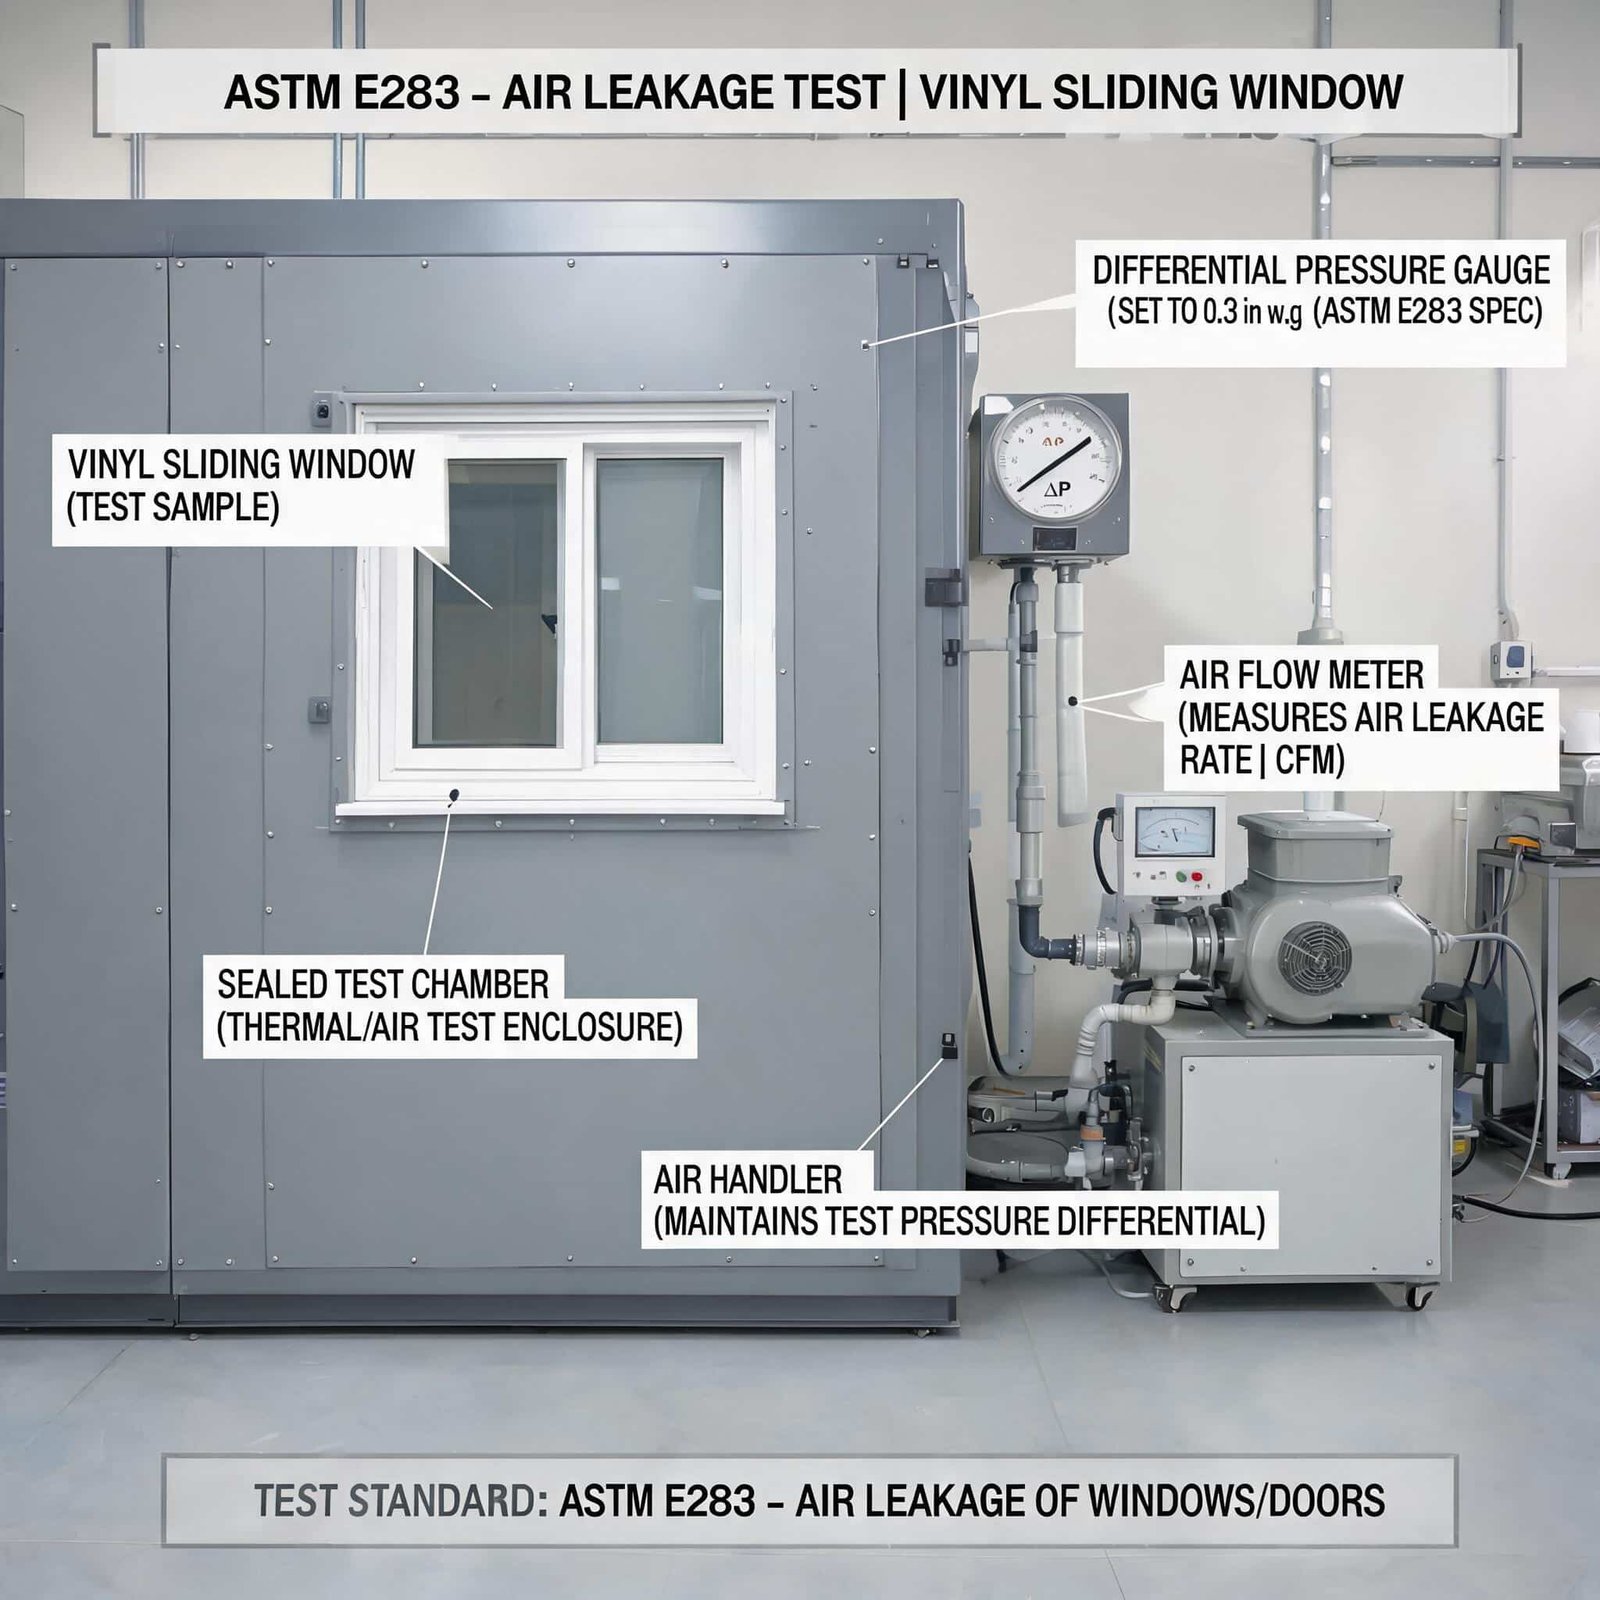
The North American Fenestration Standard is commonly used to classify window performance. Performance Grade (PG) information can be relevant to structural, air, and water-performance requirements, while test methods and required pressures depend on the applicable standard, product type, size, configuration, and jurisdiction. ASTM E331 and AAMA 501.1 may be referenced in project testing discussions, but purchasers should verify which method, specimen size, pressure, and acceptance criteria apply to the specific project.
| Application / Exposure | Minimum Recommended PG | Dynamic Water Test Basis | Typical Sill Depth |
|---|---|---|---|
| Single-family, sheltered lot | Confirm local and project requirement | Request applicable water-performance documentation | Use the tested manufacturer system |
| Suburban two-story, moderate wind | Confirm design pressures and exposure | Verify applicable laboratory or project testing | Use the tested manufacturer system |
| Coastal, high wind zone (≤ 130 mph) | Engineering and local-code review required | Verify wind-driven-rain and project requirements | Use the tested manufacturer system |
| Mid-rise / commercial glazing | Project-specific engineering required | Project mock-up or field testing may be required | Use the tested manufacturer system |
| Hurricane impact required | Confirm applicable impact and jurisdictional approval | Verify required approval and test documentation | Use the tested manufacturer system |
Two procurement points are routinely ignored:
- A PG rating must be read in context. Confirm the tested size, configuration, glazing, reinforcement, design pressure, installation limitations, and intended exposure rather than treating one label as universal proof of field performance.
- NFRC labels cover thermal information, not a complete water-management evaluation. U-factor and SHGC are useful energy metrics, but buyers should separately request applicable water-penetration, air-infiltration, structural, installation, and warranty documentation.
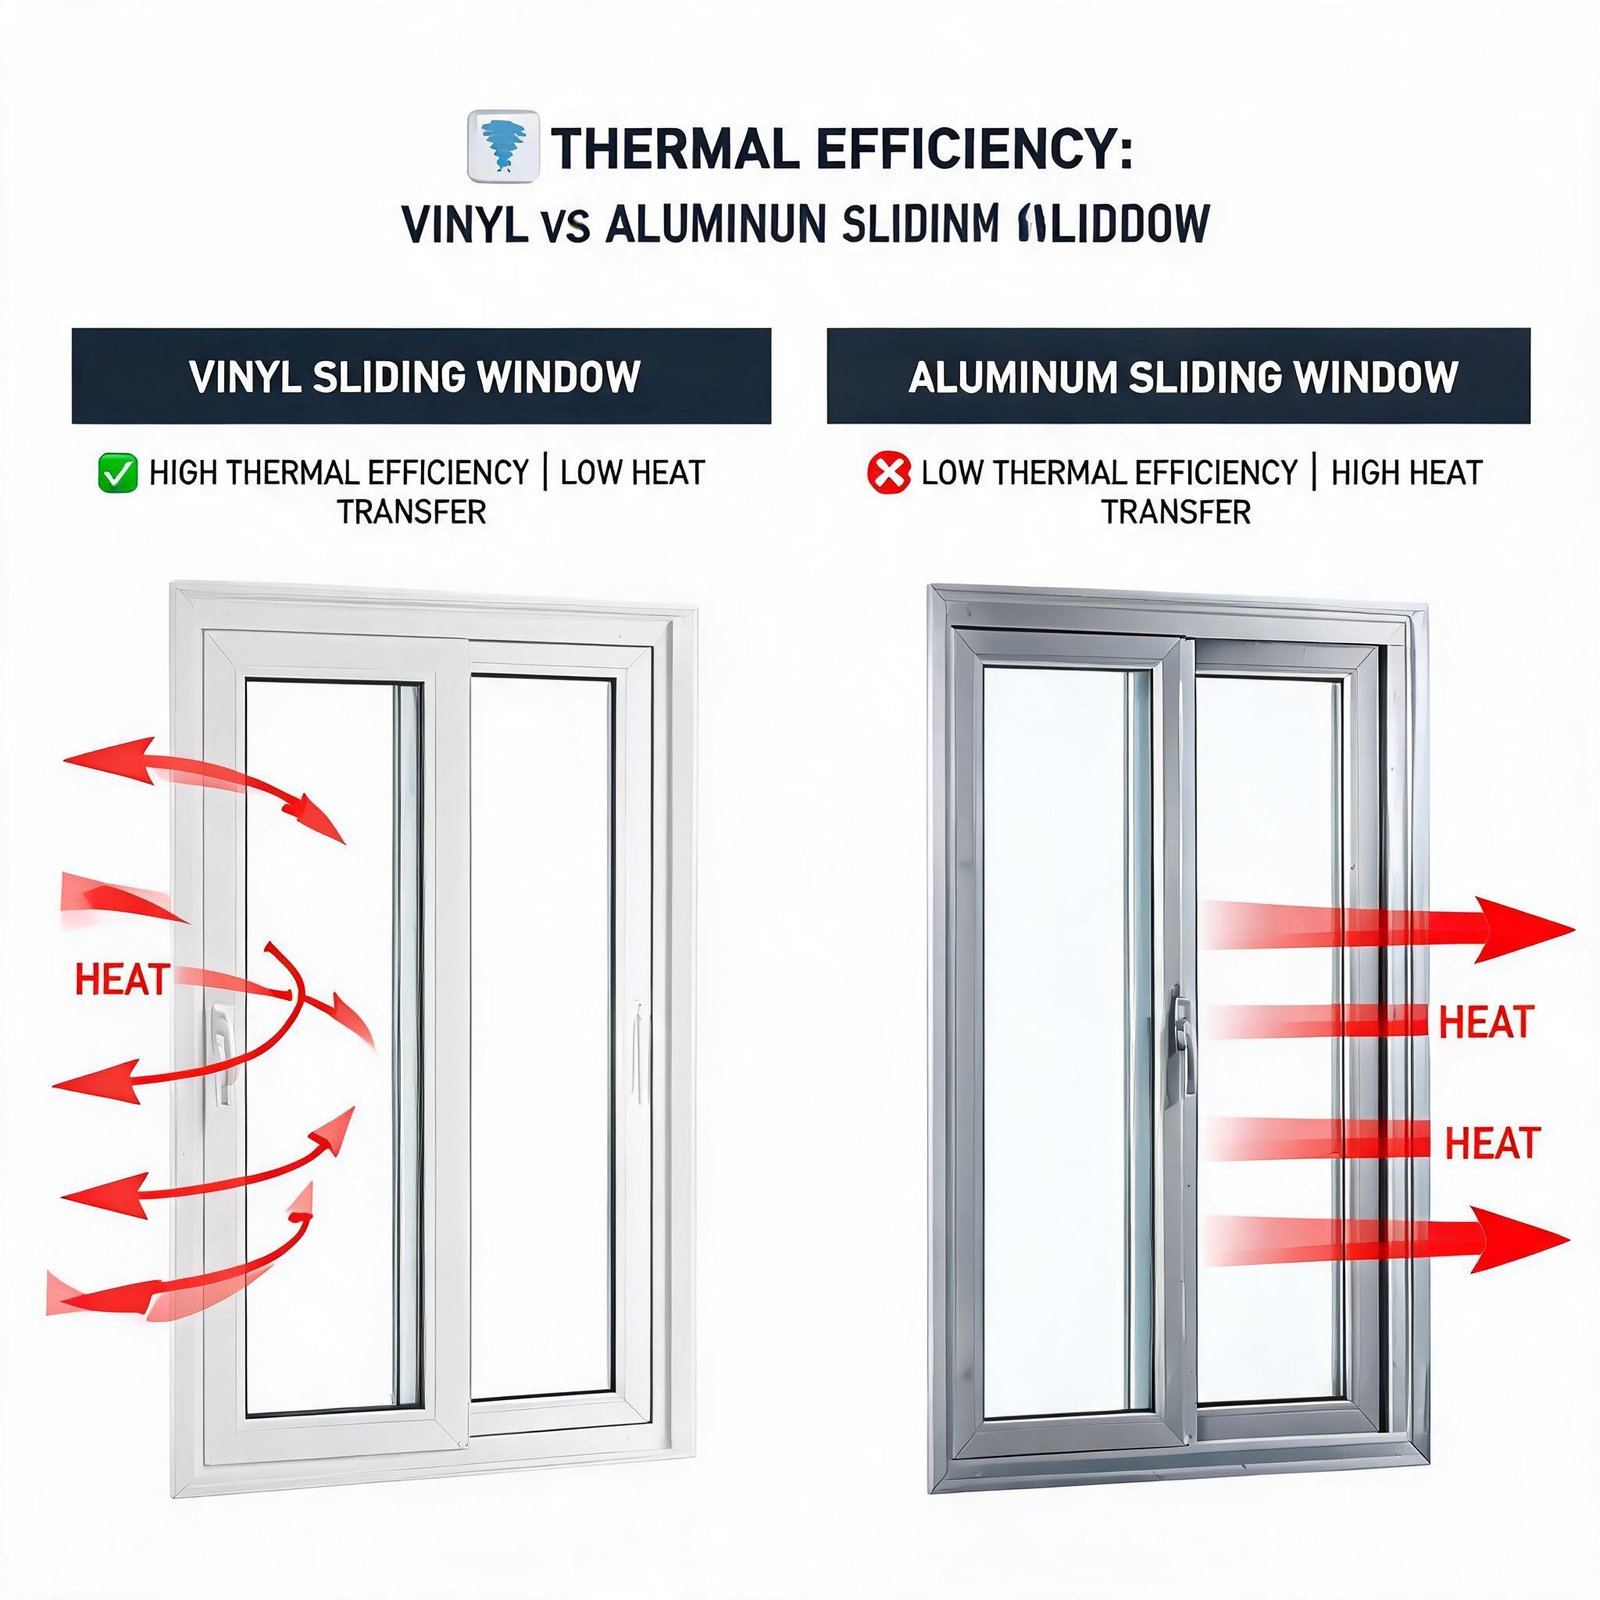
For residential production work, a well-built multi-chamber vinyl sliding window profile may be suitable when its documented configuration matches the opening and exposure requirements. For larger spans or projects requiring greater structural capacity, a properly engineered aluminum sliding window system may offer a different combination of rigidity, drainage design, and finish options. Material alone does not determine water performance.
Where the geometry, exposure, or drainage load is beyond what a horizontal sliding sash can reasonably manage, the design team can evaluate a hinged or other venting product. A compression-sealed casement or awning window configuration uses a different sealing approach, and paired double-hung window units may be considered where they meet ventilation, operation, exposure, and project-performance needs.
Windows Sweating vs. Windows Leaking: Don’t Misdiagnose Condensation
Moisture on the interior glass surface after cold weather can be condensation rather than rain intrusion. It occurs when interior air contains enough moisture to reach its dew point at the glass or frame surface.
Telling the difference is straightforward:
- Condensation commonly appears on interior glass or interior-facing sash surfaces and may be associated with high indoor humidity or cold exterior conditions.
- Intrusion commonly follows rain, appears in the track or around the frame, and may leave staining on adjacent finishes or wall materials.
Fogging between insulated glass panes can indicate a failed insulated glass unit seal. That condition is separate from sill drainage and should be evaluated under the glass or window warranty terms.
If interior condensation recurs after window replacement, review indoor humidity, ventilation, air circulation, and the thermal performance of the complete assembly. A hygrometer and a qualified building professional can help distinguish an indoor-moisture issue from an exterior water-entry issue.
Preventive Maintenance Schedule for Owners and Property Managers
Include a maintenance schedule in the closeout manual and adapt it to the manufacturer’s instructions, local climate, landscaping conditions, and building exposure.
- Twice yearly: clean the track, clear visible debris from weep holes, inspect weatherstripping, and use only manufacturer-approved lubricant on rollers or tracks where lubrication is recommended.
- Annually: inspect exterior sealant and trim conditions; after exterior renovations, confirm that drainage outlets and flashing paths have not been covered or damaged.
- After severe wind-driven rain: inspect the sill channel for unusual standing water and check interior finishes for moisture or staining.
- When wear is visible: replace damaged weatherstripping, rollers, or other serviceable components with manufacturer-approved parts.
Record maintenance and observed moisture events with dates, weather conditions, photos, and the affected opening. This documentation helps distinguish recurring installation or product issues from isolated debris-related drainage problems.
Material Selection and System Choices That Reduce Risk
Many residential sliders use vinyl frames because vinyl can provide low thermal conductivity, corrosion resistance, and welded-corner construction. Commercial and larger-opening sliding systems often use aluminum, including thermally broken options, because engineered aluminum systems can provide structural capacity and different drainage configurations. The appropriate choice depends on the tested system, opening size, glass load, climate, exposure, installation detail, maintenance expectations, and project budget.
For architects, matching window type to exposure is a high-leverage decision. Review the complete tested assembly and wall-interface detail rather than relying on sill depth, frame material, or a product category alone.
Diagnosing and Repairing: A Short FAQ
My slider leaks only during wind-driven rain. Why?
Wind-driven rain can expose weaknesses in drainage, weatherstripping, sash alignment, perimeter sealant, flashing, or product suitability. First check drainage outlets and sash closure, then review the installation and the product documentation for the actual opening conditions.
Can I just caulk the track to stop water coming through a sliding window?
No. Do not seal a designed track drainage path or weep hole. Clear the drainage route and identify the source of the water before using sealant anywhere near the sill.
Water sits in the track but the weep holes look clear. What now?
Gently flush the drainage path and observe the exterior discharge. If water remains trapped, an internal obstruction, frame issue, or installation condition may be involved. Consult the manufacturer’s installation or service manual and arrange qualified inspection before modifying or replacing the unit.
My new windows are wet every morning.
Moisture that appears on interior glass in the morning may be condensation. Check indoor relative humidity and ventilation, but inspect promptly if moisture follows rain, collects in the track, or affects surrounding finishes.
How often should weep holes be cleaned?
Inspect them at least twice yearly and after storms or exterior work that may introduce debris. Follow the manufacturer’s maintenance instructions for the specific window system.
The Builder’s Takeaway
Sliding-window water complaints commonly involve blocked drainage, worn weatherstripping, sash misalignment, failed perimeter details, installation defects, or a product that does not match the opening’s exposure. The correct repair depends on identifying which category is involved.
Select a tested unit appropriate for the actual opening. Follow the manufacturer’s installation instructions and the approved flashing details. Keep weep holes open. Use a documented post-install inspection process, and investigate any interior moisture promptly before damage spreads into the wall assembly.
That sequence — specify, install, verify, maintain — provides a practical framework for managing water around sliding windows under ordinary and wind-driven rain conditions.