If you’ve ever tried to hang blinds, mount a curtain rod bracket, or install a window lock, you’ve probably paused and wondered: can you drill into vinyl window frames without ruining them? As a window manufacturer, I hear this question almost daily—and the internet is full of half-answers and forum guesswork. The truth is more nuanced than a simple yes or no. Drilling into a window frame isn’t just about making a hole; it’s about knowing what the frame is made of, where the structural and drainage components sit, and which fasteners will hold securely without causing cracks, leaks, or a voided warranty.
In this definitive guide, I’ll walk you through everything you need to know about screwing into window frames—whether you’re installing a brand new window unit into a rough opening, or you’re attaching hardware to an existing frame. You’ll learn material‑specific techniques for wood, vinyl (uPVC), aluminium, and fibreglass, which screws and drill bits actually work, and the critical mistakes that lead to cracked vinyl, seized balances, or internal water damage. By the end, you’ll have the confidence to fasten securely and protect your investment.
Understanding the Two Very Different Scenarios
Most DIY confusion starts here: people use the same search terms to describe completely different tasks. There are two core scenarios when you drive screws into a window frame, and they demand different approaches.
- Frame‑to‑structure installation: You’re fastening a whole window unit to the rough opening (studs, brickwork, or timber subframe). The screws go through the outer frame jambs and into the building. This is a construction‑grade task that affects weather sealing, plumb, and square.
- Hardware‑mounting on an existing frame: You’re attaching something onto the interior or exterior surface of an already‑installed window—blinds, curtain rod brackets, security sensors, secondary glazing, or decorative trim. The screw penetrates only part of the frame profile and must avoid internal balances, drainage channels, and glass.
This guide covers both, with clear step‑by‑step advice and material‑specific warnings drawn from decades of manufacturing experience.
Frame Material Deep‑Dive: How Each Substrate Behave
Before you pick up a drill, you need to understand how your window frame material reacts to cutting and load. Treating a vinyl frame like a wood frame is the fastest way to an expensive repair.
Wooden Window Frames
Timber is forgiving. You can drill pilot holes with a standard twist drill bit, and the wood fibres provide excellent holding power for standard wood screws. Hardwood (oak, mahogany) requires slightly more care than softwood (pine, spruce), but in general you can screw directly into the frame without special fasteners. The biggest risk is splitting near the end grain or piercing through too close to the edge, so always pre‑drill a hole 75–80% of the screw’s minor diameter. Use a countersink bit to let the screw head sit flush, especially if you’ll be applying trim later.
Vinyl (uPVC / PVC) Window Frames
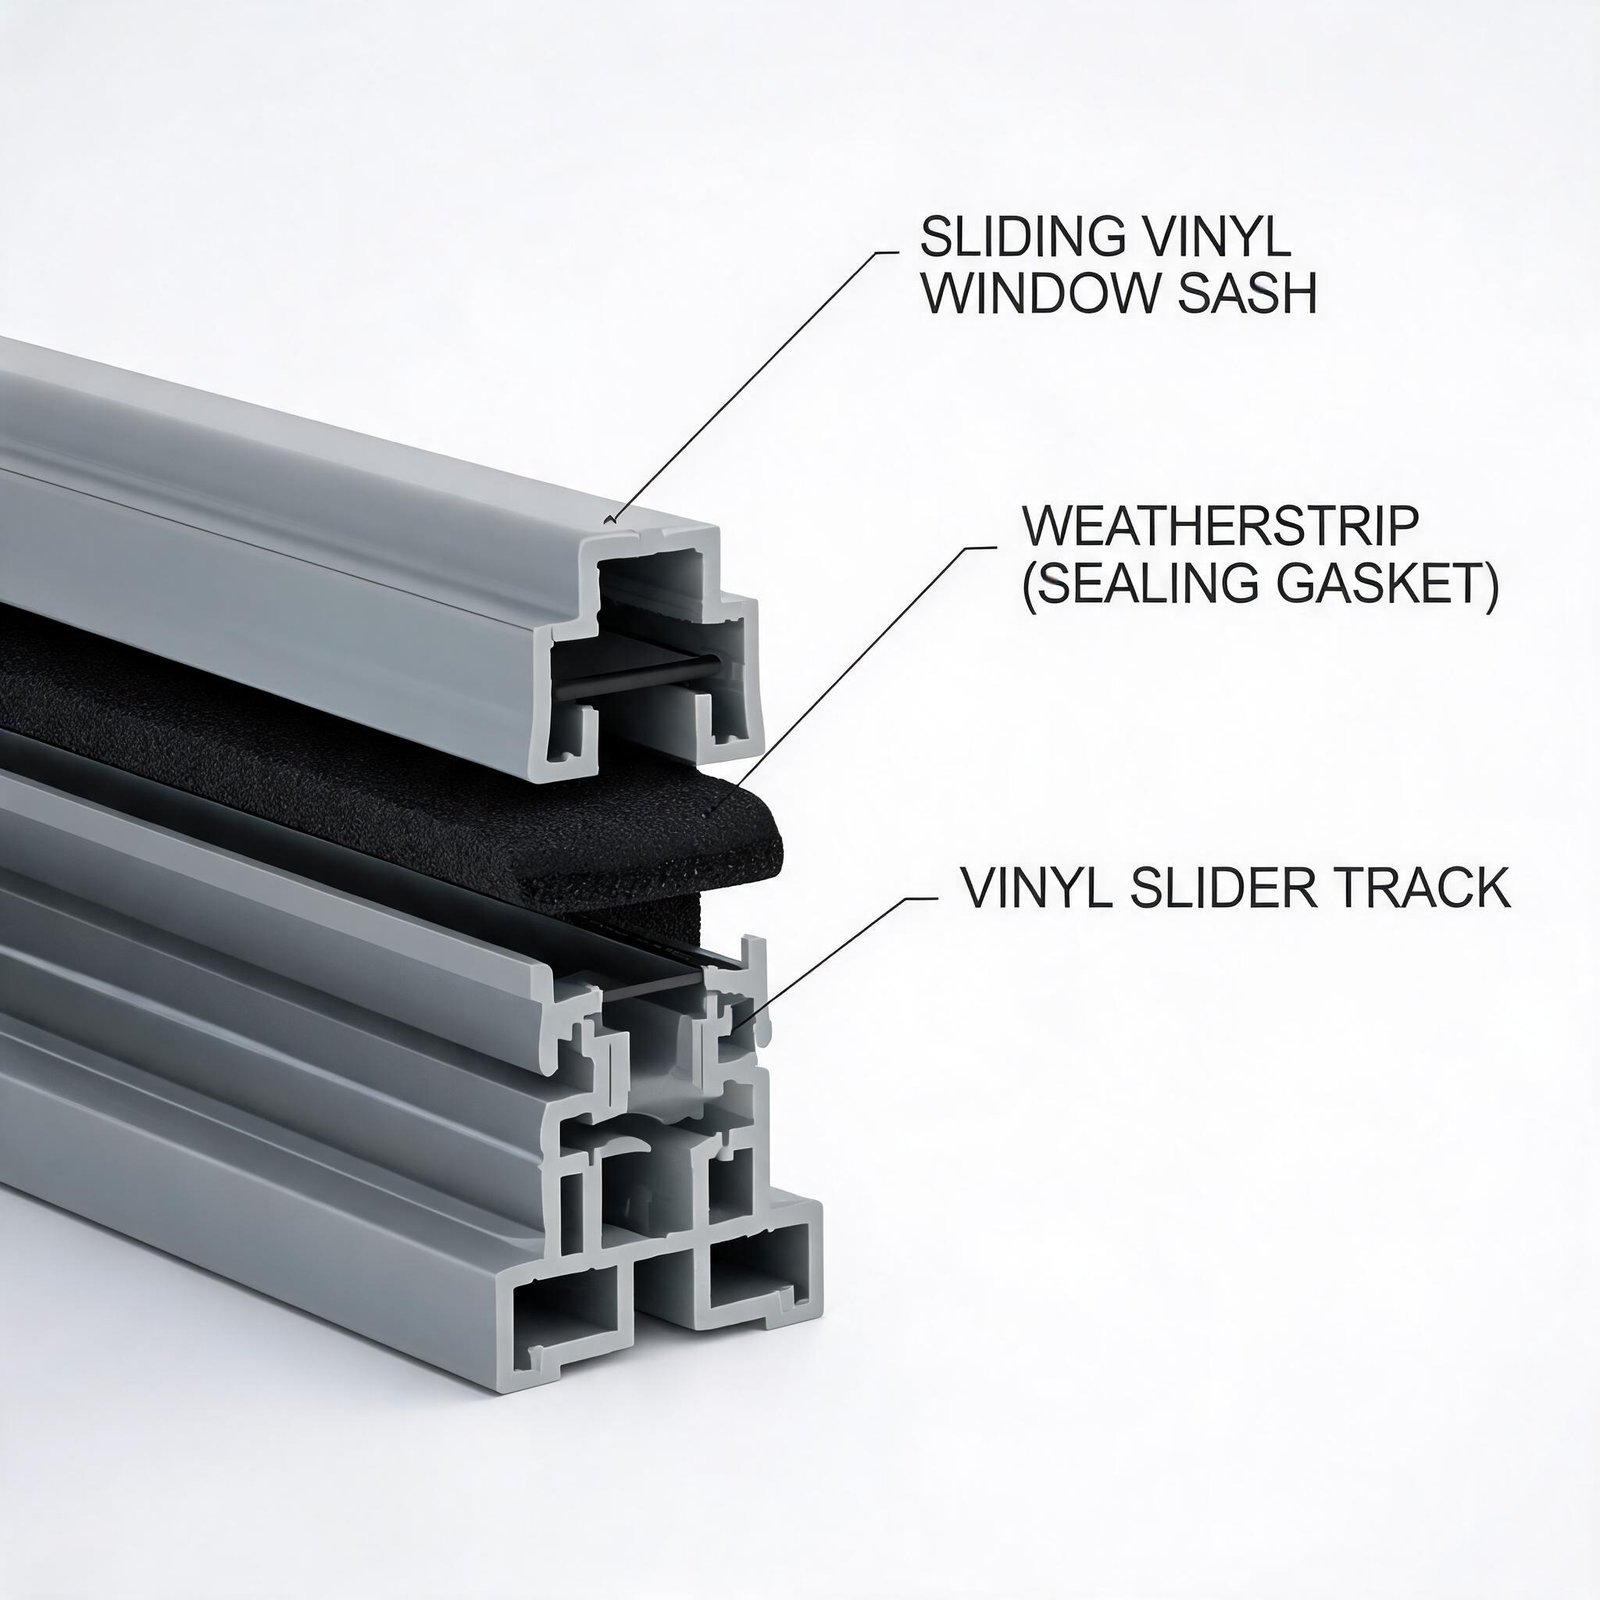
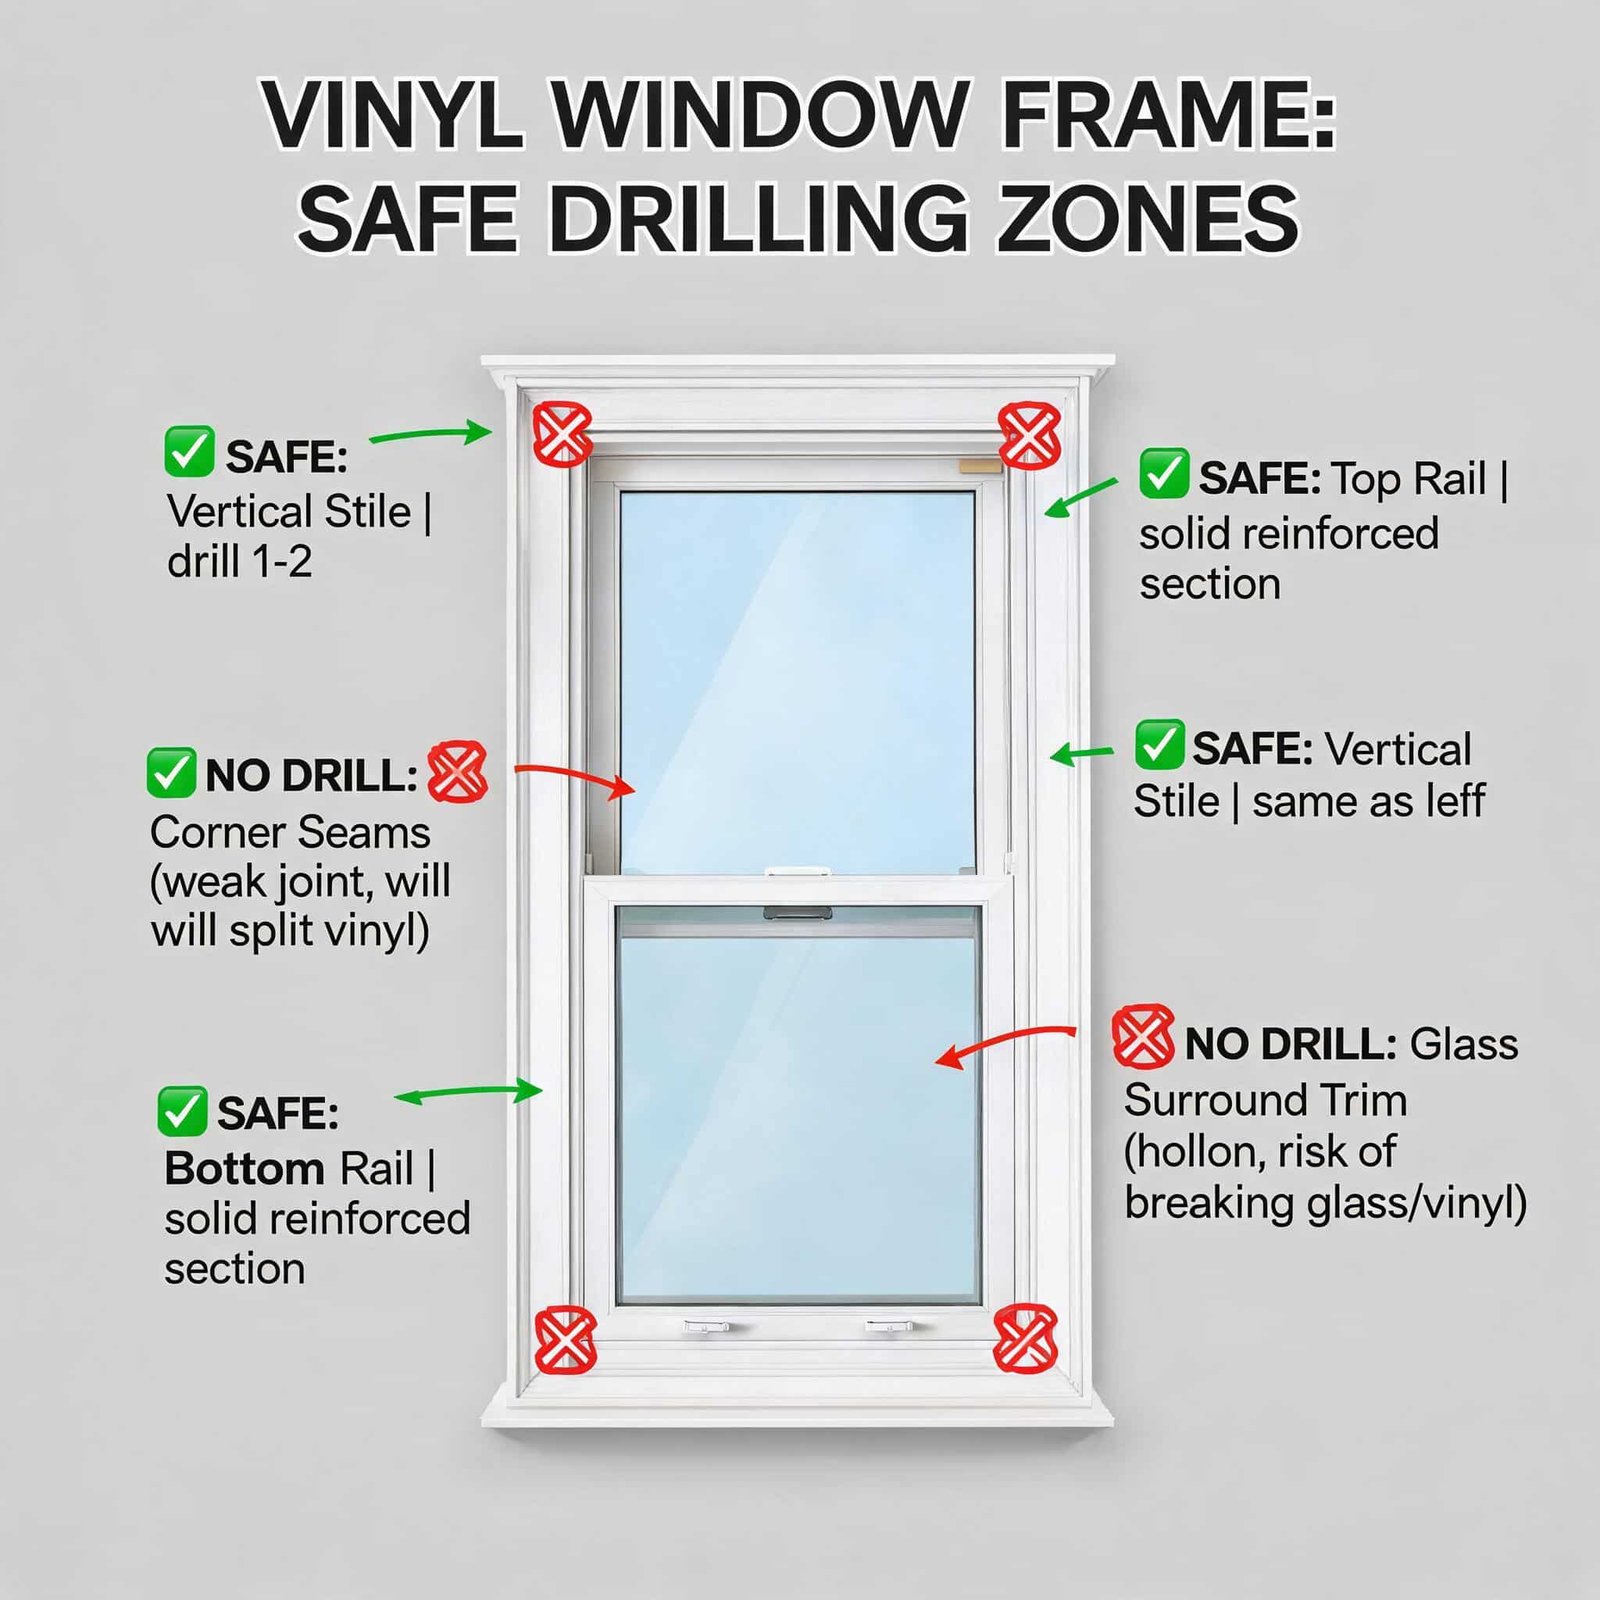
This is the most searched‑for material, and for good reason. Vinyl is tough but brittle in thin sections, and it expands and contracts significantly with temperature changes. The biggest concerns are cracking, deforming the profile, and breaking the water‑tight seal. As a manufacturer of premium uPVC profiles, I often get asked: can you drill into vinyl window frames safely? Yes—but only if you follow strict rules. You must never drill into the bottom track of a sliding window, the glazing bead area, or anywhere that intersects the balance system cavities. Use a sharp, high‑quality multi‑purpose twist drill bit, and always pre‑drill a hole slightly larger than the screw’s solid shank to prevent stress build‑up. Self‑drilling screws designed specifically for plastics work beautifully when you need to avoid cracking in thin walls. For exterior penetrations, you must seal around the screw head with a neutral‑cure polymer sealant to maintain the weather barrier. Never use an impact driver on vinyl; the hammering action will micro‑fracture the profile.
If you’re exploring can you drill holes in vinyl windows, your frame’s internal wall thickness matters. Our advanced uPVC systems, for example, use multi‑chambered designs with reinforcement that can safely accept small diameter screws in designated mounting zones. Always check the manufacturer’s technical documentation first.
Aluminium Window Frames
Aluminium is strong and stable, but it’s much harder than wood or vinyl. You’ll need high‑speed steel (HSS) or cobalt drill bits, cutting fluid to reduce heat, and either fine‑thread machine screws into a pre‑tapped hole or self‑tapping metal screws. The real danger with aluminium is galvanic corrosion—if you use standard steel screws, you’ll set up a battery effect that eats the frame from the inside out. Always choose stainless steel or coated screws rated for aluminium contact. Structurally, aluminium frames often have internal thermal breaks made of polyamide; drilling straight through both materials requires careful speed control to avoid melting the plastic break.
Fibreglass Window Frames
Fibreglass composites combine the workability of wood with the durability of PVC. They can be drilled and screwed much like hardwood, and they resist cracking remarkably well. Standard twist bits and conventional wood‑type screws get the job done. The main caution: fibreglass dust is an irritant, so wear a respirator and eye protection. When fastening into hollow fibreglass profiles, avoid over‑torquing, which can crush the laminate.
Selecting the Right Screws and Drill Bits
Choosing the wrong fastener is probably the single most common mistake people make—and it can turn a simple job into a frame replacement.
- For wooden frames: Standard zinc‑plated or stainless steel wood screws. T‑star or Phillips drive heads. Pre‑drill with a brad‑point bit for clean entry.
- For vinyl frames, interior mounting (blinds, brackets): Self‑drilling screws with a fine thread, designed for plastics (type TR or similar). Length: no more than 1¼” (30 mm), often shorter for thin‑wall profiles. Use a multi‑purpose twist drill bit sized 1/64” smaller than the screw’s minor diameter.
- For vinyl frames, exterior structural installation: Corrosion‑resistant coated or stainless steel pan‑head screws. A nylon washer under the head helps distribute pressure and seal the hole. Pre‑drill through the vinyl and into the structural substrate behind.
- For aluminium: 304 or 316 stainless steel self‑tapping screws (type F or tek screws). Drill bit: HSS split‑point with cutting fluid. In marine areas, always step up to 316 stainless.
- For fibreglass: Standard multipurpose screws with a corrosion‑resistant finish. A spear‑point or self‑drilling tip prevents splitting.
A quick material‑by‑material cheat sheet sits below for reference:
| Frame Material | Recommended Screw Type | Recommended Drill Bit |
|---|---|---|
| Wood | Tapered wood screw, stainless | Brad‑point or standard twist |
| Vinyl (interior) | Self‑drilling plastic screw | Sharp twist bit (pre‑drill) |
| Vinyl (structural) | Pan‑head stainless with washer | Multi‑purpose twist bit |
| Aluminium | Stainless self‑tapping metal screw | HSS or cobalt bit + cutting fluid |
| Fibreglass | Multi‑purpose composite screw | Standard twist bit |
Step‑by‑Step: Installing a Window Frame Into a Rough Opening With Screws
This is the heavy‑duty job: you’ve got a new or replacement window that needs to be fixed squarely into the building structure. The process remains broadly similar across materials, but I’ll call out the critical divergences.
- Set the unit in place and use inflatable air shims (or traditional wedges) to hold the window precisely where you want it. Check that the frame is centred in the opening, with consistent margins.
- Check for level and plumb on all four sides. Use a 4‑foot spirit level horizontally across the sill, and vertically along the jambs. Adjust the shims until the frame sits dead level and square. An out‑of‑square window will bind, leak, and not lock correctly.
- Mark your fastener locations. Most manufacturers pre‑drill mounting holes, but if yours doesn’t, position screws 6‑8 inches from corners and about every 16 inches along the jambs. Avoid any area that lines up with the balance, drainage slots, or welds in a vinyl frame.
- Pre‑drill through the frame. For wood and fibreglass, a standard pilot hole works. For vinyl, drill a clearance hole about 1/32″ larger than the screw shaft to permit thermal movement without binding. For aluminium, pre‑drill with a properly lubricated HSS bit.
- Drive the screws. Use a standard variable‑speed drill, never an impact driver on vinyl or aluminium. Tighten until the screw head contacts the frame firmly but does not distort its surface. In vinyl, you’re looking for a snug, not a reef‑tight, hold. Flange‑head screws or screws with integral washers spread the clamping force and reduce stress.
- Insulate and seal. After all screws are in, remove the shims (if temporary) and fill any shim gaps with minimally expanding window foam. On the exterior, apply a continuous bead of sealant over the screw heads and around the perimeter following the manufacturer’s drainage principles.
Step‑by‑Step: Mounting Hardware to an Existing Frame (Blinds, Curtains, Sensors)
This is the situation most DIYers face—and the one that prompts the question: can you drill into vinyl window frames without causing a disaster? Here’s how to do it right.
- Identify your frame’s mounting zone. In a typical vinyl casement or double‑hung window, the safe area is the flat face of the interior jamb, away from the glass, balance springs, and weatherstripping track. Never drill into the sill track, head track, or the narrow side edges that house the balance system. If you can see a balance spring or a cord, stay at least 2 inches away from that vertical line.
- Hold the bracket in position and mark with a pencil. Double‑check that the hardware will not obstruct the window’s operation. Open and close the sash to be certain.
- Select a drill bit that matches your screw. For vinyl, a bit diameter equal to the solid shaft of the screw (excluding the threads) is ideal. Wrap a piece of tape around the bit at the depth you intend to drill, leaving a flag so you don’t punch through into the glass or outer wall.
- Drill slowly and straight. High speed creates heat that can soften and gum up the vinyl. Apply gentle, steady pressure and let the bit do the work. For aluminium, use a drop of cutting oil and a slower RPM.
- Install the screw. Place the bracket over the hole and drive the screw by hand until it’s snug. Resist the urge to over‑tighten; if the head craters the vinyl surface, back off a quarter turn. For exterior‑mounted brackets, apply a small ring of neutral‑cure sealant around the thread before driving to maintain water tightness.
- Test the window operation immediately. If the sash drags or the lock doesn’t engage, you’ve likely driven a screw too long or in the wrong spot. Back it out, fill the hole with a colour‑matched vinyl repair compound, and relocate.
If you’re uncertain about your frame’s mounting strength, check out how our engineered uPVC windows are designed with built‑in mounting channels for can you mount blinds on vinyl windows without penetrating the main weather seal. These integrated features make hardware attachment easier and keep the warranty intact.
Critical Risks, Warranties, and Hidden Damage
A simple screw hole can create chain‑reaction problems that remain invisible until it’s too late. Here’s what I always tell customers to watch for.
- Water ingress: Any screw that penetrates the frame’s outer skin creates a potential path for rainwater. In vinyl and aluminium, baffled weep systems channel water out to the exterior; a misplaced screw can block those channels or let water migrate behind the siding. Always seal exterior penetrations.
- Balance system damage: Double‑hung and single‑hung windows contain spring or cord balances inside the side jambs. Drilling into that cavity can shear a balance tube, fray a cord, or dislodge a block‑and‑tackle shoe. The result is a window that won’t stay up or falls suddenly—a real safety hazard.
- Warranty voiding: Almost every major window manufacturer explicitly states that drilling non‑factory holes into the frame voids the warranty. If you’re unsure, contact the manufacturer for their written policy. On high‑end fibreglass and vinyl systems, even a small hole can nullify a lifetime guarantee.
- Condensation and frost: A cold‑side screw that bridges the thermal break can create a condensation point inside the frame, leading to rot in wood, or ice build‑up and mould on vinyl and aluminium.
- Frame cracking: The number‑one cause of cracked vinyl around screw holes is thermal expansion combined with an oversized screw. That’s why clearance holes and self‑drilling plastic screws are non‑negotiable.
Pro Tips From the Factory Floor
Over the years, I’ve gathered a handful of field‑proven tricks that save time and prevent call‑backs.
- Use painter’s tape over the spot you intend to drill on vinyl or aluminium—it prevents the bit from skating and gives a clean hole edge.
- When fastening into a hollow vinyl frame, add a plastic anchor designed for hollow‑wall applications (a “zip‑it” type) for blind brackets. It distributes the load across the inner wall and prevents pull‑out.
- Never use a hammer drill feature on window frames. The percussive action is guaranteed to crack the material.
- Keep the bit sharp. A dull bit melts vinyl instead of cutting it, which causes a messy, oversized hole and weakens the area.
- For exterior structural screws in vinyl frames, apply a polyurethane or MS polymer sealant to the screw shaft, not silicone. Silicone contains acetic acid that can attack some finishes.
Conclusion
Drilling into a window frame isn’t a one‑method‑fits‑all job. Whether you’re securing a whole window unit into a rough opening or simply hanging a blind bracket, the material under your drill bit dictates every decision—from the type of screw and drill bit to where you place the hole and how you seal it. By respecting the differences between wood, vinyl, aluminium, and fibreglass, avoiding critical internal components, and following the step‑by‑step methods outlined here, you can drill confidently without compromising the window’s performance or warranty. And if you ever hesitate, consult the manufacturer’s technical guide or reach out to a professional.