Adding window boxes to your home instantly boosts curb appeal, but if you have vinyl siding, the process can feel intimidating. Many homeowners worry about damaging their siding or creating leaks. As a manufacturer who has engineered mounting solutions for thousands of homes, I can tell you that attaching window boxes to vinyl siding is not only possible—it’s straightforward when you follow the right method.
The secret lies in working with the siding, not against it. You don’t need to remove panels, cut holes, or compromise your home’s weatherproofing. This guide covers everything from material selection to weight considerations, ensuring your window boxes stay secure for years.
Understanding Your Vinyl Siding and Window Box Compatibility
Before picking up any tools, it’s important to understand how vinyl siding behaves. Unlike wood or brick, vinyl expands and contracts with temperature changes. It’s also hollow behind the face, meaning you cannot simply screw into the siding material itself. The siding is cosmetic—your mounting hardware must penetrate through to the structural sheathing and wall studs behind it.
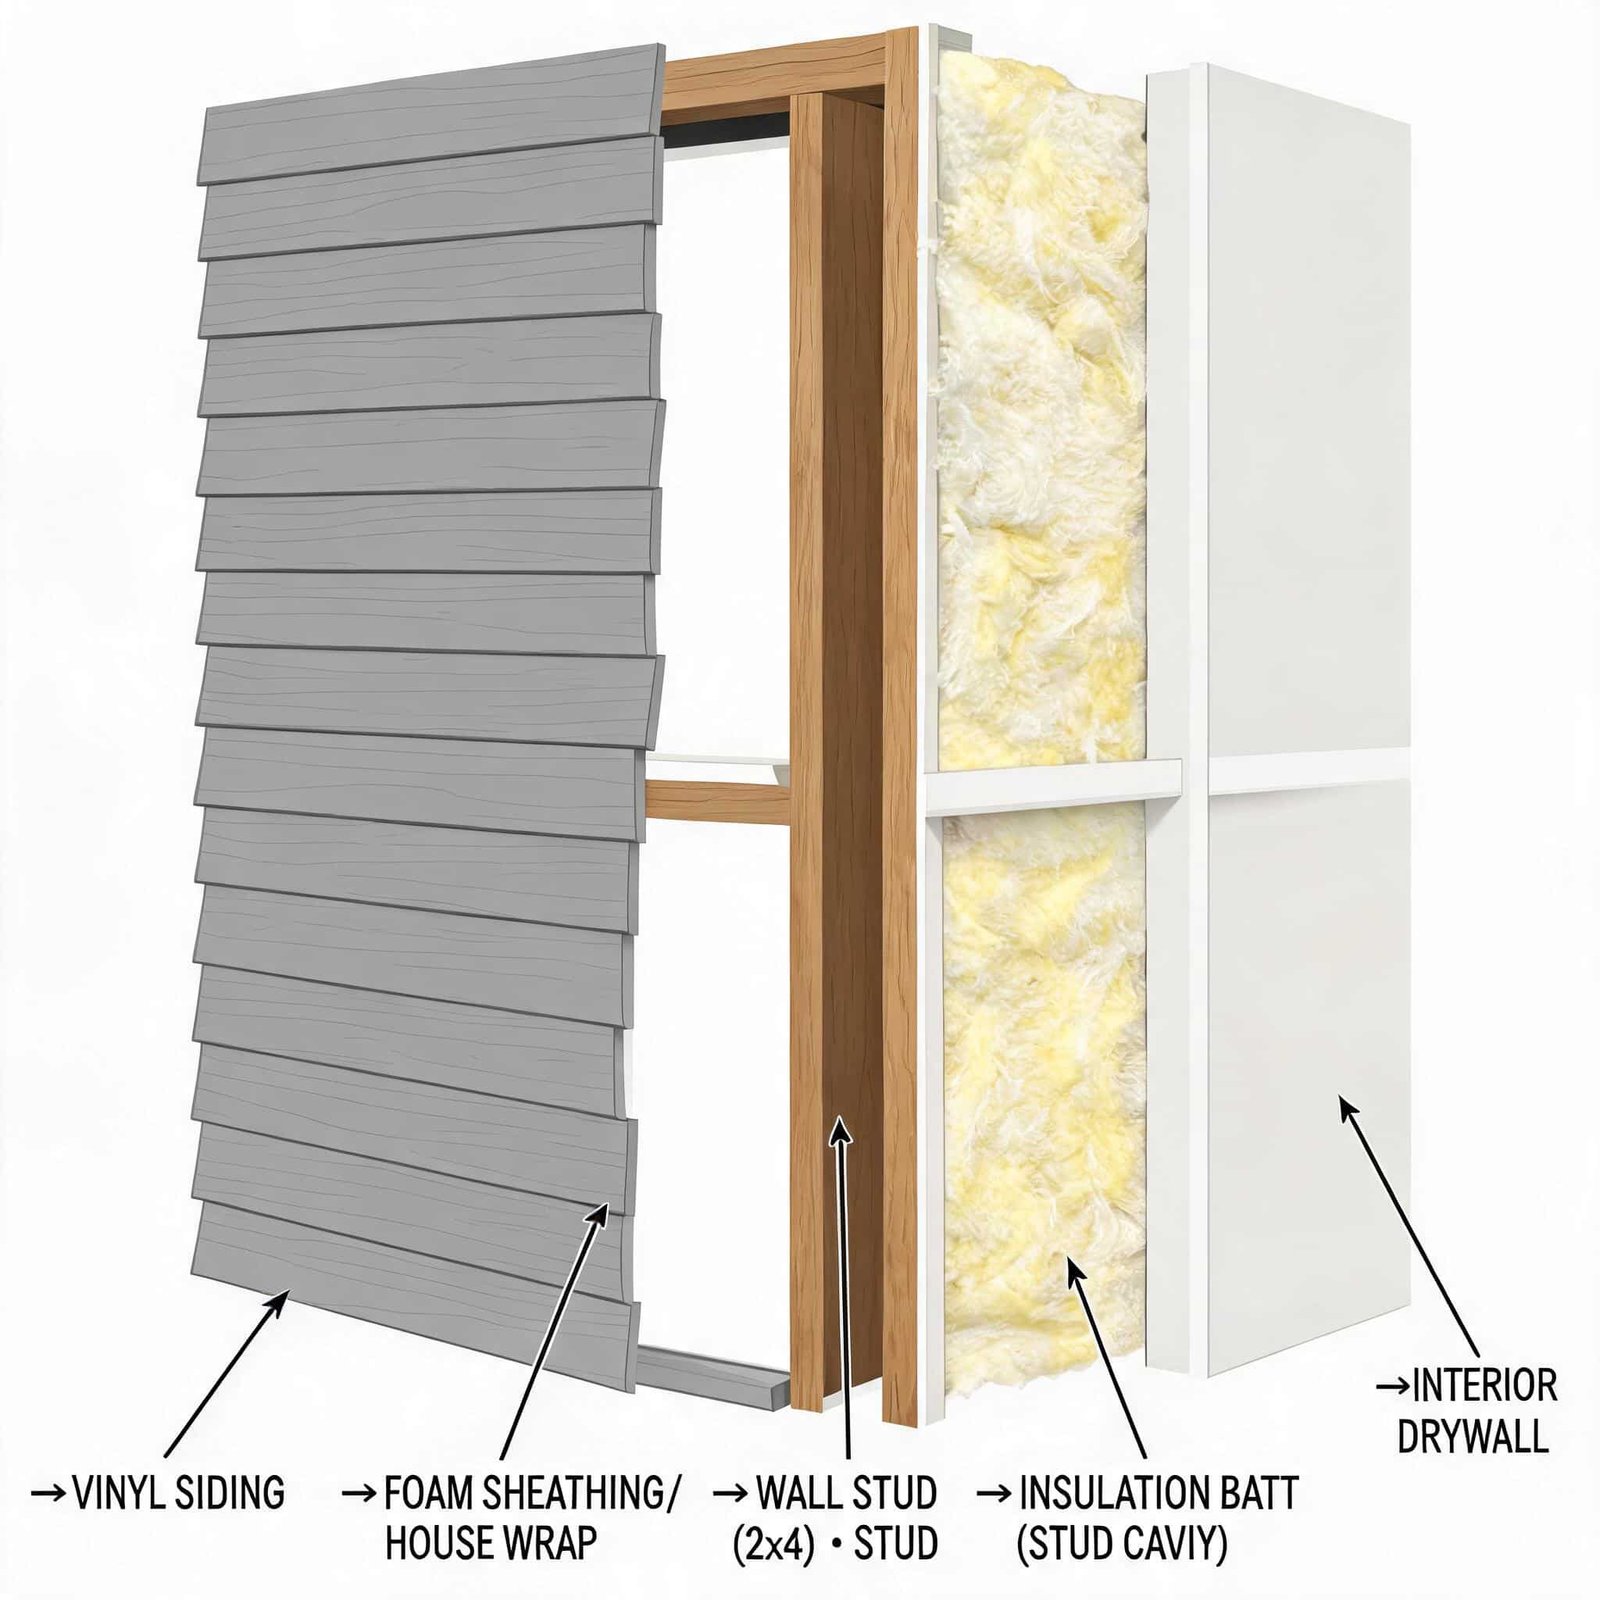
This is where most DIY guides fall short. They tell you to find a stud, but they don’t explain what happens when your siding’s profile makes that tricky. Vinyl siding comes in different profiles—Dutch lap, beaded, clapboard, and vertical. Each has a different locking mechanism and face curvature. The method we’ll cover works across all standard profiles, but you need to account for the siding’s thickness and the gap between the siding and the sheathing.
Weight capacity is another overlooked factor. A standard 36-inch window box filled with wet soil and blooming annuals can weigh 40 to 60 pounds. Your mounting system must handle that load plus wind uplift. Using lag screws into studs is the only reliable method. Never rely on siding clips or adhesive mounts for anything heavier than empty plastic boxes.
Essential Materials and Tools for Mounting Window Boxes
Materials You’ll Need
- Lag screws: 3/8-inch diameter, 4 to 5 inches long, with washers. Stainless steel or galvanized for corrosion resistance.
- Exterior-grade silicone caulk: Clear or color-matched to your siding.
- Wood shims: For leveling if your window sill is uneven.
- Window box brackets: Heavy-duty wrought iron or powder-coated steel, rated for at least 75 pounds per pair.
- Your window boxes: Ensure they have pre-drilled mounting holes or a flat back for bracket attachment.
Tools You’ll Need
- Stud finder: A deep-scan model that detects studs through siding and sheathing.
- Power drill with masonry bit: For pilot holes through the siding and sheathing.
- Socket wrench or impact driver: For driving lag screws.
- Level: A 4-foot or 6-foot level for accuracy.
- Pencil or marker: For marking stud locations.
- Safety glasses and gloves: Always protect yourself.
Step-by-Step Guide to Securing Window Boxes on Vinyl Siding
Step 1: Locate the Wall Studs
This step determines everything. Without a solid anchor into a stud, your window box will eventually sag or pull loose. Use a deep-scan stud finder and run it horizontally across the wall below your window. Mark each stud location with a pencil. Standard stud spacing is 16 inches on center, but always verify.
For wider windows, you may need three brackets—one on each end and one in the center. For standard 36-inch windows, two brackets into two studs is sufficient. If your window is off-center from studs, you may need to adjust bracket placement or use a mounting board that spans multiple studs.
Step 2: Drill Pilot Holes Through the Siding
With your stud locations marked, position your brackets against the siding. Use a level to ensure they’re perfectly horizontal. Mark the screw holes through the bracket onto the siding.
Now drill pilot holes. Use a drill bit slightly smaller than your lag screw diameter. Drill straight through the vinyl siding, through the foam insulation (if present), and into the sheathing. Stop when you hit solid resistance—that’s the stud. You should feel the bit bite into wood. Drill about 1 inch deeper than your screw length to allow for the screw tip.
Important: Do not force the drill. If you hit metal, you may have struck a plumbing pipe or electrical line. Stop and relocate your bracket slightly.
Step 3: Drill Holes in the Window Boxes
If your window boxes don’t have pre-drilled mounting holes, measure and mark locations that align with your brackets. Drill holes slightly larger than the lag screw diameter to allow for adjustment. This is also the time to add drainage holes if your boxes lack them—drill 1/2-inch holes every 6 inches along the bottom.
Step 4: Check Your Measurements
Before final installation, dry-fit everything. Place the brackets against the siding, insert the lag screws through the bracket and into the pilot holes, but don’t tighten. Set the window box on the brackets and check alignment. The box should sit level and flush against the wall. Adjust bracket height if needed.
This is also when you check for siding interference. The bracket should not pinch or deform the siding. If the siding lip prevents the bracket from sitting flat, use a wood shim behind the bracket to create a gap. Caulk around the shim to seal it.
Step 5: Seal Holes with Caulk
This step is non-negotiable. Every hole you drill through vinyl siding is a potential water entry point. Apply a generous bead of exterior silicone caulk around each pilot hole before inserting the screw. When you drive the screw, the caulk will compress and form a watertight seal around the threads.
Also apply caulk behind the bracket where it contacts the siding. This prevents water from wicking behind the bracket and freezing in winter. For extra protection, apply a small bead around the screw head after tightening.
Step 6: Attach the Boxes with Lag Screws
Now it’s time for the final mount. Insert the lag screws with washers through the bracket and into the pilot holes. Tighten with a socket wrench or impact driver. Do not overtighten—you want the bracket snug against the siding, not crushing it. Vinyl siding needs room to expand. If you compress the siding, it may buckle in summer heat.
Once the brackets are secure, set the window box onto them. Most brackets have a lip or flange that the box rests on. Secure the box to the brackets using the manufacturer’s hardware or short stainless steel screws through the box bottom into the bracket.
Step 7: Enjoy Your New Window Boxes
With the boxes mounted, step back and admire your work. Fill them with lightweight potting mix and your favorite flowers. Remember that wet soil is heavy, so choose plants that don’t require constant saturation. Consider using a liner or plastic insert to protect the wood or metal box from moisture.
Weight Limits and Siding Compatibility: What You Need to Know
Not all vinyl siding installations are equal. The method described works best when your siding is installed over plywood or OSB sheathing, with studs at standard 16-inch spacing. If your home has foam insulation board between the siding and sheathing, you’ll need longer screws—up to 6 inches—to reach the studs.
Maximum recommended weight: For a standard installation with two lag screws into studs, do not exceed 75 pounds total per bracket pair. For heavier boxes, use three brackets or a continuous mounting board that spans three studs.
Siding type considerations: This method works on all residential vinyl siding profiles. For vertical siding, mount brackets to the vertical battens or add blocking behind the siding. For insulated siding panels, drill through the foam carefully and ensure your screw reaches solid wood.
Common Mistakes and How to Avoid Them
Mistake 1: Using siding clips or adhesive mounts. These products work for lightweight decorative items but fail under the weight of soil and water. Always screw into studs.
Mistake 2: Not sealing holes. Even one unsealed screw hole can allow water to penetrate behind your siding, leading to rot or mold. Caulk every penetration.
Mistake 3: Overtightening screws. Vinyl siding needs to move. Tighten until the bracket is snug, then stop. If you see the siding dimpling around the screw, you’ve gone too far.
Mistake 4: Ignoring the window sill. Your window box should sit just below the sill, not touching it. Leave a 1/4-inch gap for air circulation and to prevent moisture trapping.
Mistake 5: Forgetting about winter. In cold climates, soil in window boxes freezes and expands. Use lightweight, frost-resistant containers and consider removing boxes in winter to extend their life.
How to Maintain Your Window Box Mounts
Once installed, your window box mounts require minimal maintenance. Check the caulk seals annually before winter. Reapply caulk if you see cracks or gaps. Inspect the lag screws for rust—if you used galvanized screws in a coastal environment, consider upgrading to stainless steel.
Every spring, before planting, remove the window boxes and check the brackets. Tighten any loose screws. Clean the brackets with a mild detergent to remove dirt and pollen. This is also a good time to repaint or touch up the brackets if needed.
Frequently Asked Questions
Q: Can I install window boxes on vinyl siding without drilling into studs?
A: No. For anything heavier than an empty plastic box, you must anchor into wall studs. Siding alone cannot support the weight of soil, water, and plants.
Q: Will drilling through vinyl siding cause leaks?
A: Not if you properly seal each hole with exterior silicone caulk. The caulk creates a watertight barrier around the screw. This is standard practice for mounting anything to siding.
Q: How do I find studs behind vinyl siding?
A: Use a deep-scan stud finder designed for finding studs through siding and sheathing. Standard stud finders may not penetrate thick siding. Alternatively, look for nail heads or use a strong magnet to locate siding nails, which are driven into studs.
Q: What if my window is between studs?
A: Install a horizontal mounting board that spans across two or three studs. Attach the board to the studs using the same method, then mount your window box brackets to the board.
Q: How much weight can window box brackets hold?
A: Heavy-duty brackets rated for 75 pounds per pair are standard. For larger boxes, use three brackets or a continuous mounting board. Always check the manufacturer’s weight rating.
Q: Can I use this method on other types of siding?
A: This method works on vinyl, aluminum, and fiber cement siding. For wood siding, use shorter screws and pre-drill to prevent splitting. For brick or stone, you’ll need masonry anchors and a hammer drill.
Q: Do I need to remove the window boxes in winter?
A: It’s recommended if you live in freezing climates. Soil expands when frozen, which can crack wooden or ceramic boxes. Metal and plastic boxes are more frost-resistant but may still benefit from winter removal.
Q: How do I clean vinyl siding around window boxes?
A: Use a soft brush and mild detergent. Avoid pressure washers, which can force water behind the siding. Rinse with a garden hose. Clean the siding before reinstalling boxes each spring.